


Habemus Papam! We created a token on the Binance Smart Chain, more as an exercise than for other reasons. However, you never know. For the sake of brevity, I report here the steps followed which you can also find on the Binance website. There were no particular executive difficulties. Everything went smoothly.
In the meantime, I would like to emphasize that this is a token. When it comes to cryptocurrency, there are 2 possibilities: the coin or the token. A coin has its own blockchain, while a token relies on a pre-existing blockchain, in our case that of the Binance Smart Chain. Other alternatives can be Ethereum, the most popular along with Binance, Solana, and Polygon.
Creating a token is certainly less expensive as it doesn’t require a team of experienced developers. The development of the token certainly requires some experience but can be created in no time.
If you don’t want to create a token yourself, you can turn to a paid token creation service.
Before creating your crypto it is good that you understand its real usefulness for your purposes, and inform yourself of the crypto legal framework in the country in which you reside. Once the token has been created, you can request an audit by some certifying body and a legal opinion.
We will show you that anyone can easily create a token, but making it a project of objective value requires work and dedication.
How to create a BEP-20 token
To create a simple BEP-20 token, you’ll need some basic coding skills to deploy a smart contract to Binance Smart Chain, nothing more.
Step 1: Install MetaMask. MetaMask can be downloaded on Chrome and Firefox, or on iOS and Android if you’re a mobile user. We installed the Chrome extension. Follow the setup guidelines specified during installation. Go ahead and click Create a Wallet. Write down the backup seed phrase somewhere secret (preferably not on an Internet-connected device). Without this phrase, your funds can’t be recovered if your device is damaged or lost. Confirm that you’ve written them down on the next page. And that’s it! You should now see your wallet, ready to send and receive funds.
Step 2: Change default settings. Your default wallet will be an Ethereum wallet. Let’s change that. Access the Settings to point the wallet towards Binance Smart Chain nodes. On the Settings page, you must locate the Networks menu. Click Add Network in the top-right corner to manually add the Binance Smart Chain one. It’s important to note that there are two networks you can use here: the testnet or the mainnet. Make sure you have the BSC mainnet added to MetaMask. Here are the parameters:
Mainnet
Network Name: Smart Chain
New RPC URL: https://bsc-dataseed.binance.org/
ChainID: 56
Symbol: BNB
Block Explorer URL: https://bscscan.com
Once you Save the Network and return to the main view, you’ll notice that the network has automatically been set to the one you just entered, and the units are no longer denominated in ETH, but in BNB.
Step 3: Add some BNB to your wallet to pay gas fees. Hover over Account 1, and click to copy your address where to send some BNB.
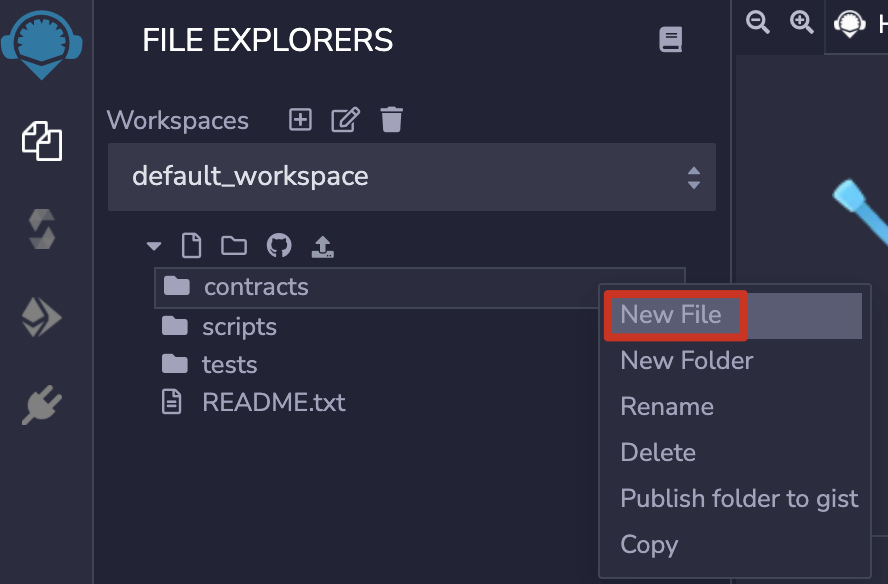
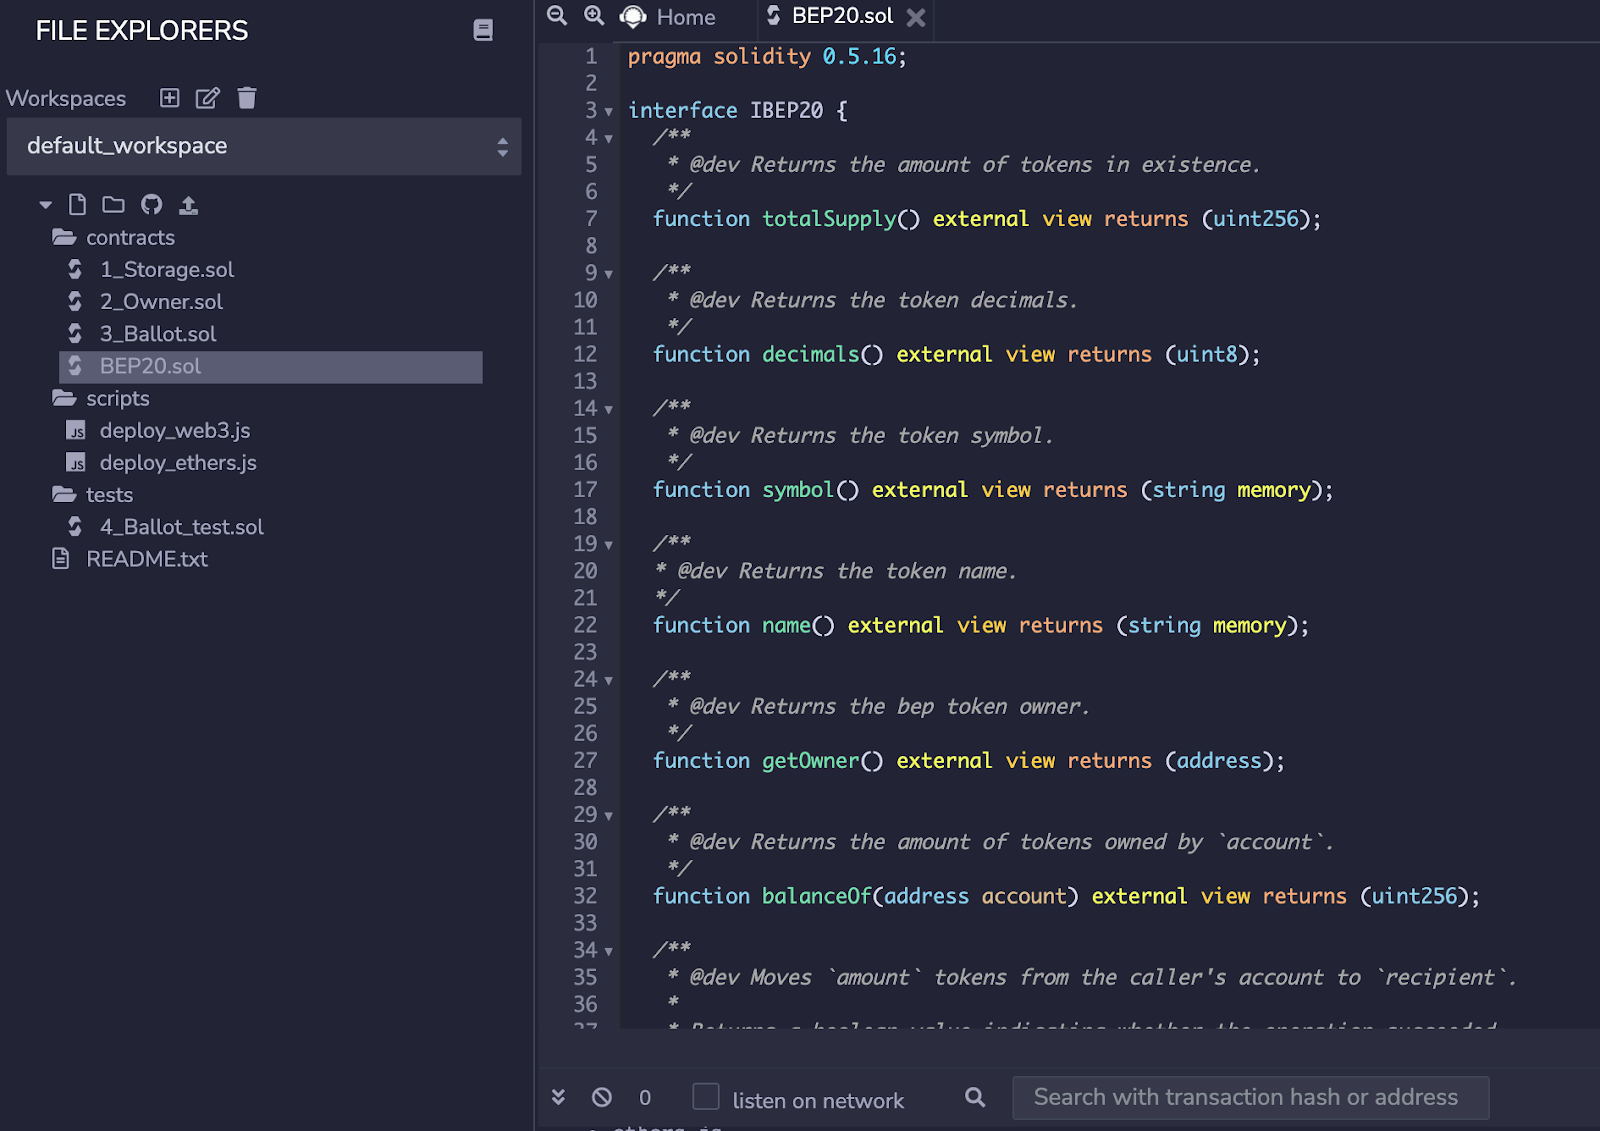
Step 4: Download Remix, an online application for developing and deploying smart contracts on blockchains that are compatible with the Ethereum Virtual Machine. Right-click the [contracts] folder and click [New File].
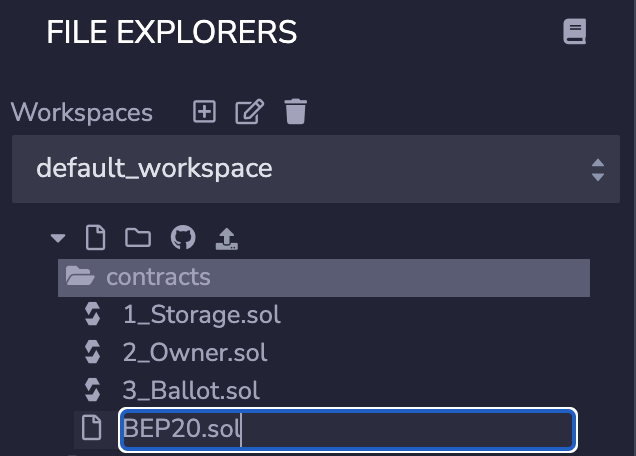
Step 5: Name the file “BEP20.sol”.
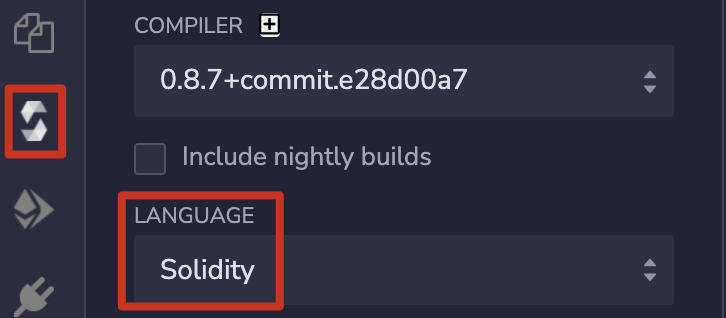
Step 6: Make sure you have the programming language set as [Solidity], or your smart contract won’t function. You can do this by clicking the icon outlined below on the right.
Step 7: Copy the BEP-20 smart contract code into your file. You can find out more information on the code’s parameters and functions on GitHub.
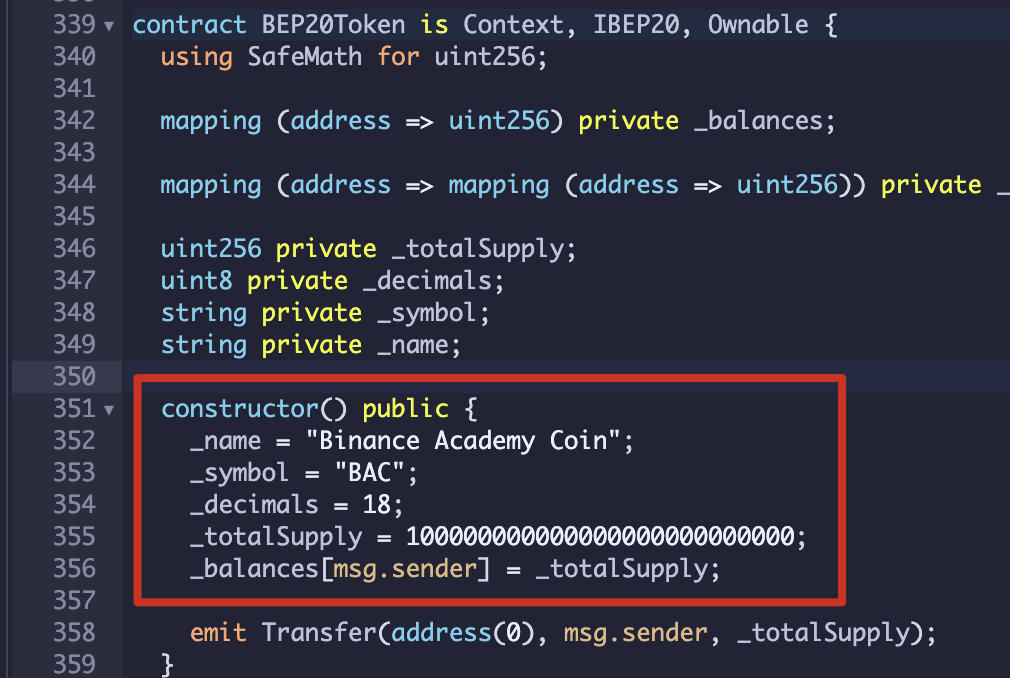
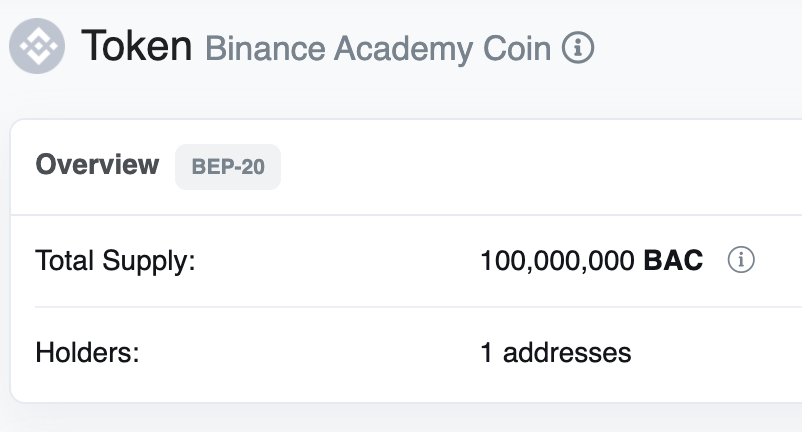
Step 8: Modify the _name, _symbol, _decimals, and _totalSupply for your coin. Here we’ve chosen Binance Academy Coin (BAC) as an example, with 18 decimal places and a total supply of 100,000,000. Don’t forget to add enough 0s to cover the 18 decimal places.
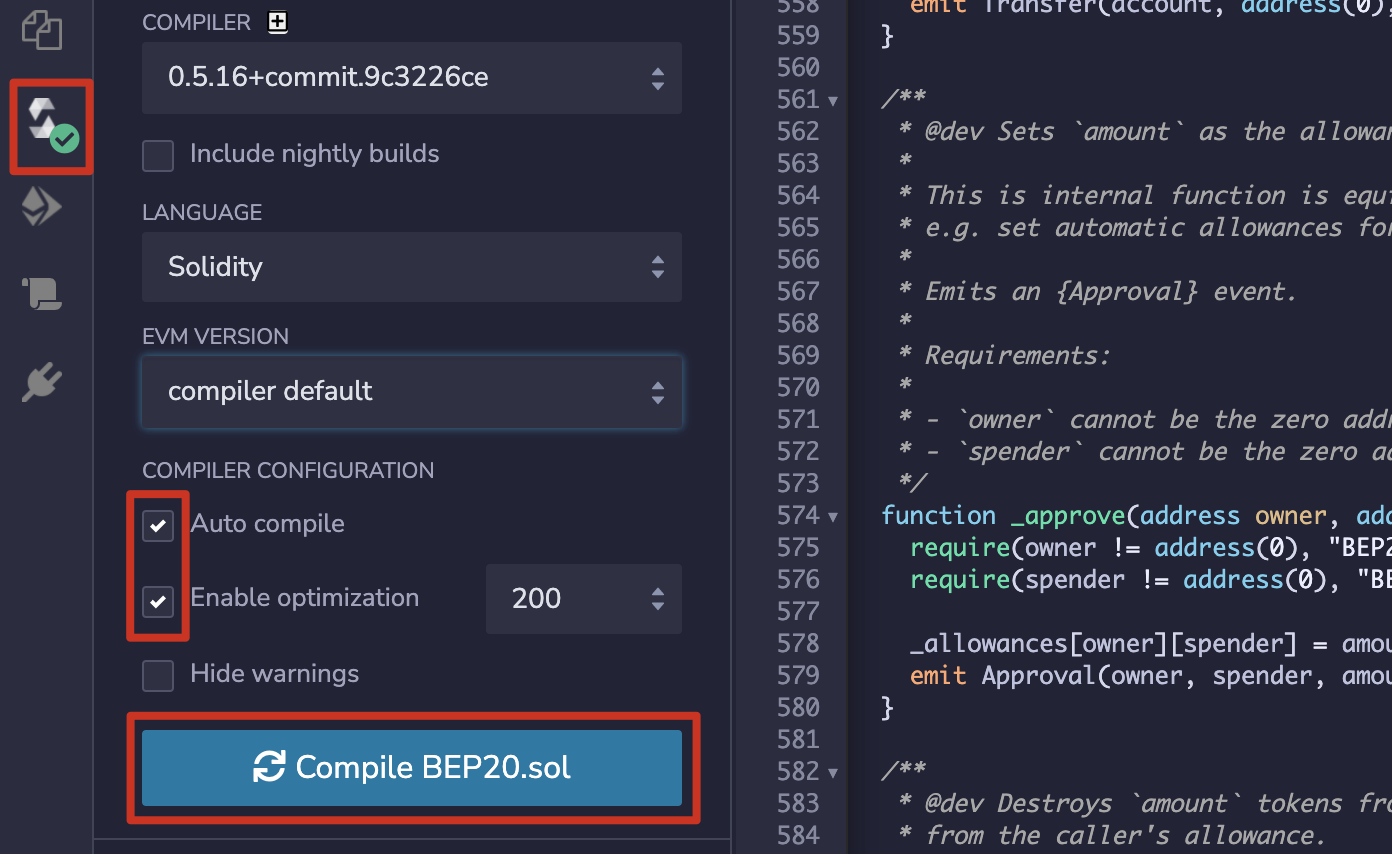
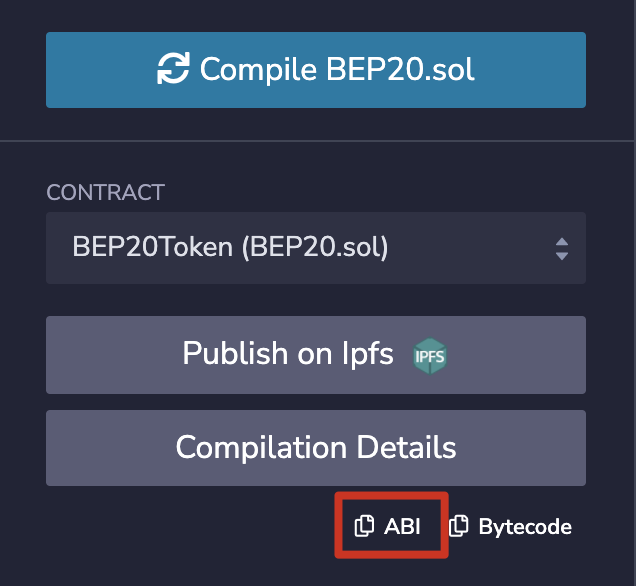
Step 9: Compile the smart contract. Click the icon shown below on the left side of the screen, check [Auto compile] and [Enable optimization], then click the [Compile] button.
Step 10: Click the [ABI] button to copy the contract’s ABI.
Step 11. Click the icon highlighted below on the left-hand side of the screen. Select [Injected Web3] as your environment and then allow MetaMask to connect to Remix. Finally, make sure you’ve selected your BEP20 contract before clicking [Deploy].
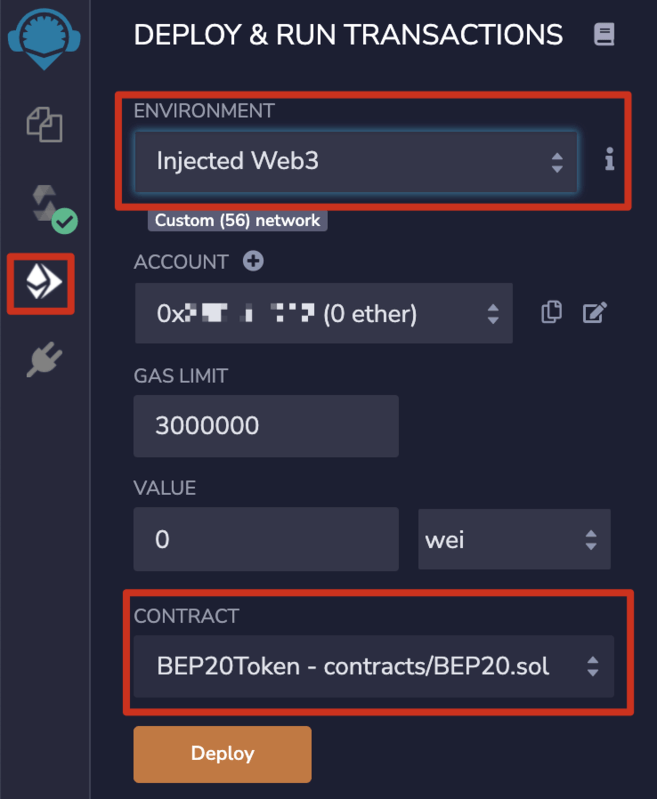
Step 12: Pay a transaction fee via MetaMask to deploy the contract to the blockchain.
Once the smart contract is live, you need to verify and publish your contract source code.
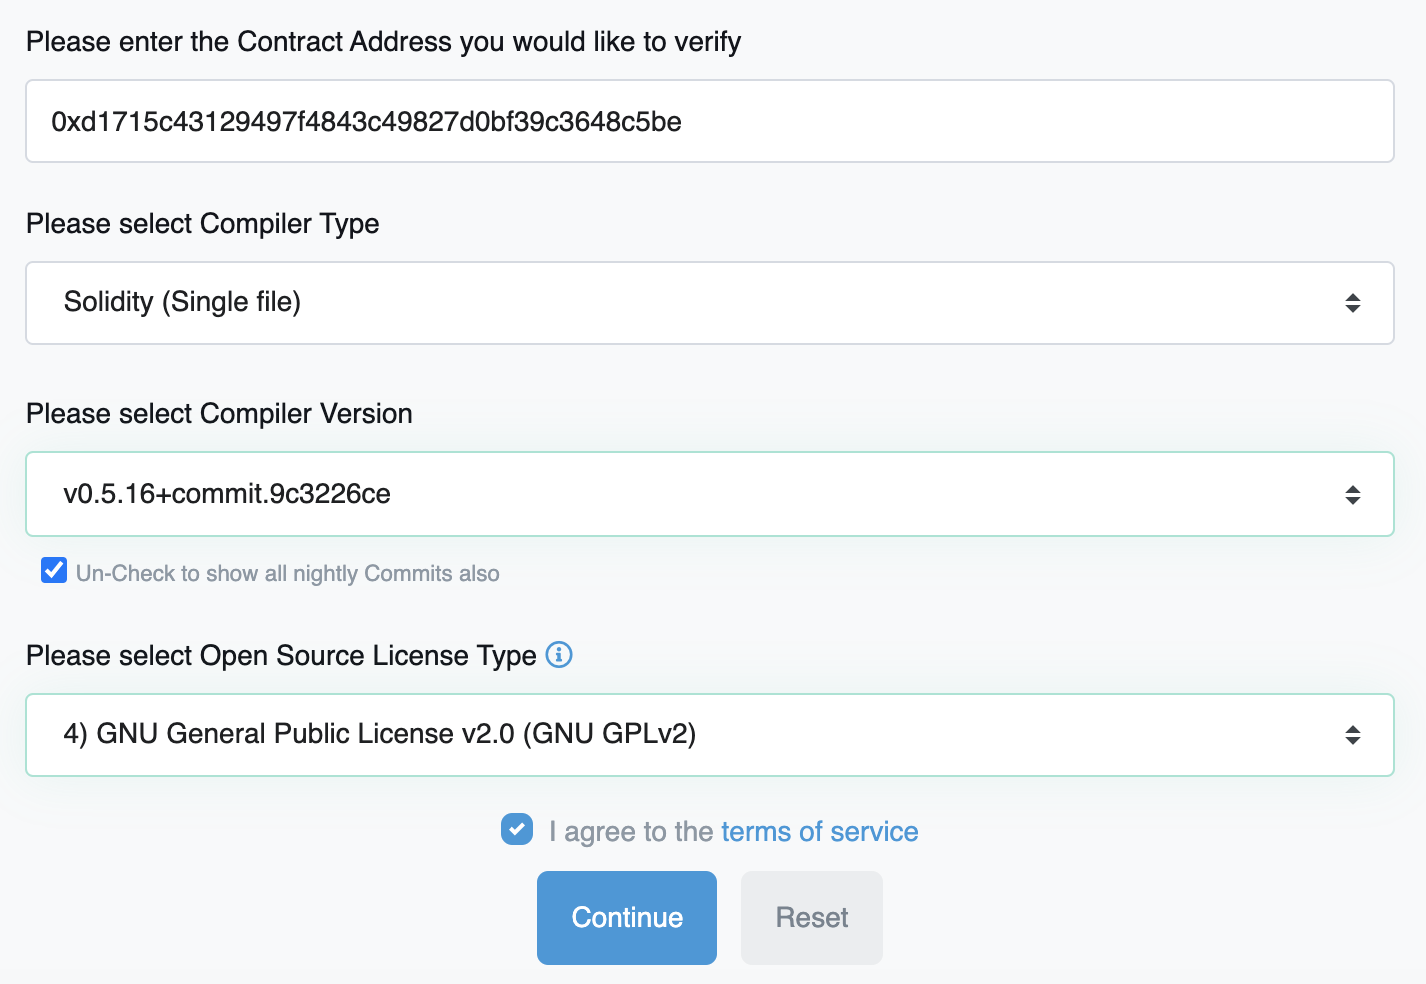
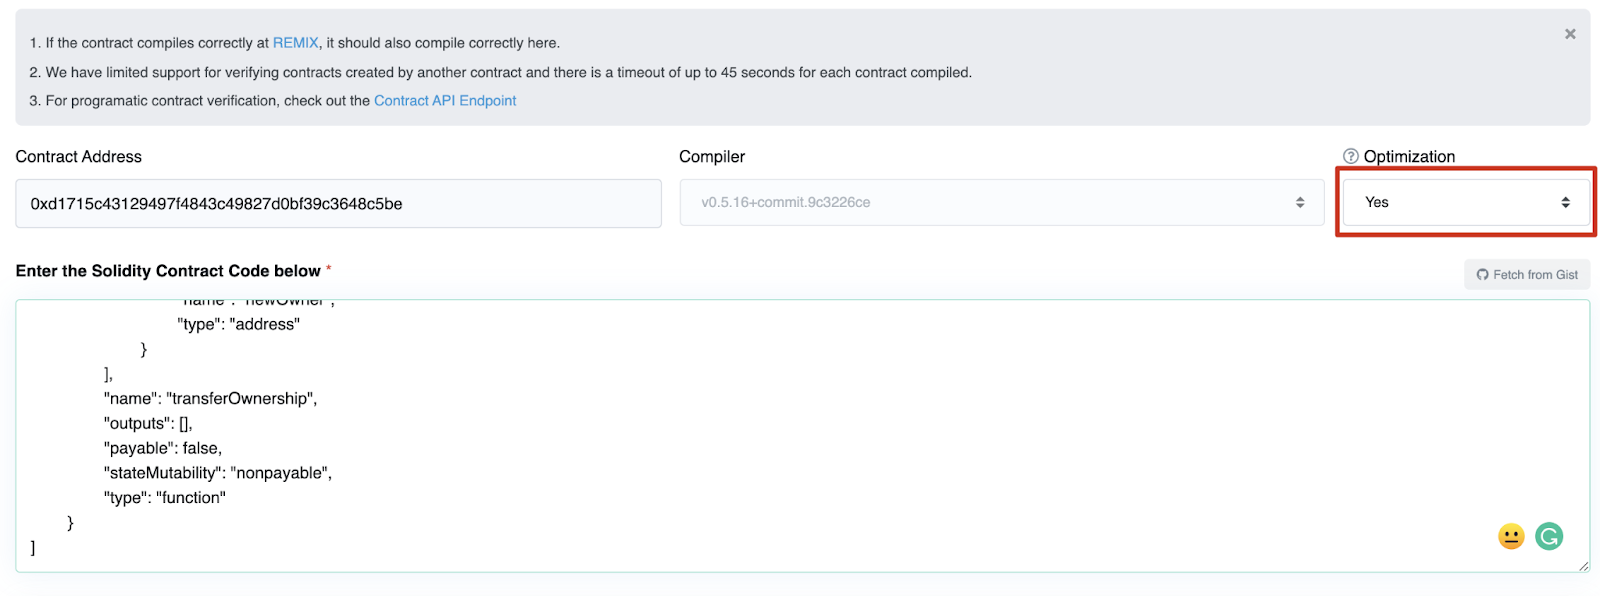
Step 13: Copy the contract’s address to BscScan, select [Solidity (Single)] as the compiler type, and match the compiler version used in step 7.
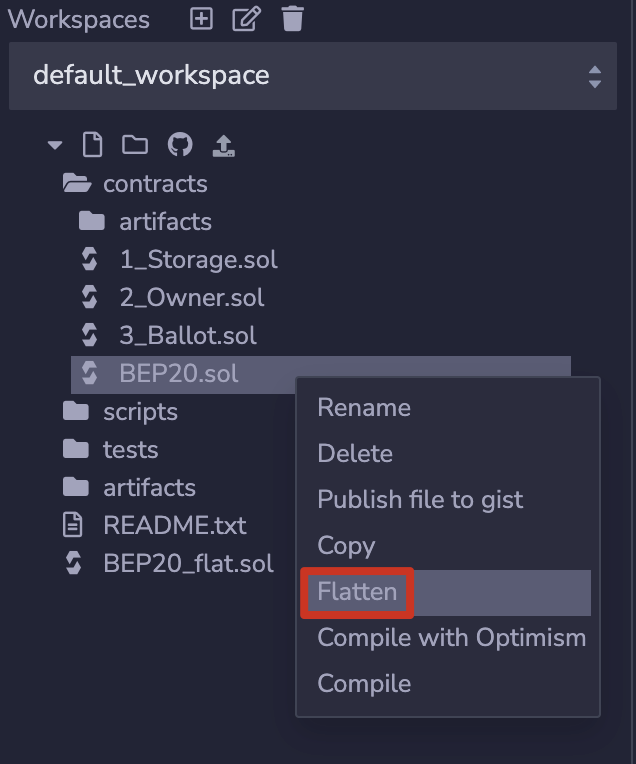
Step 14: Right-click BEP20.sol in Remix and press [Flatten]. You’ll then need to give Remix permission to flatten the code.
Step 15: Copy the code from your BEP20_flat.sol into the field, and ensure [Optimization] is set to Yes. Now click [Verify and Publish] at the bottom of the page.
You’ll now see a successful splash screen.
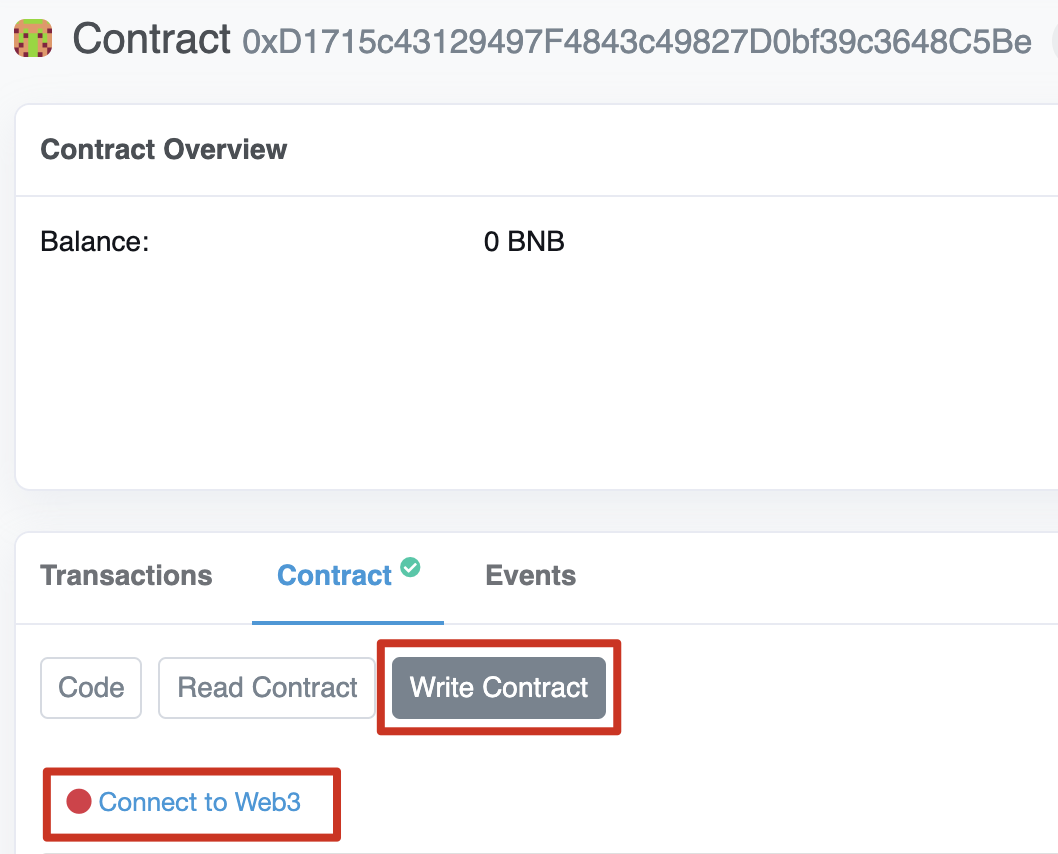
Step 16: With the verified code, mint your token through BscScan by using the _mint call implemented in the contract. Go to the contract address on BscScan and click [Write Contract], then click [Connect to Web3] to connect your MetaMask account.
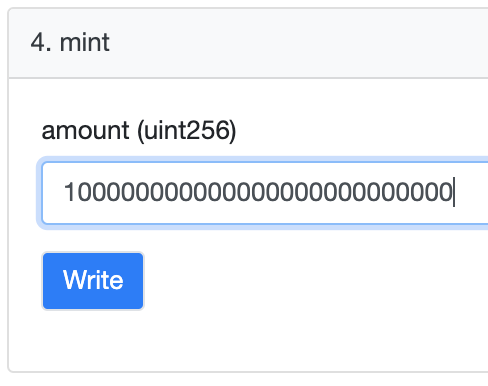
Step 17: Head down the page to the Mint section, and input the number of tokens you want to mint. We’re going to mint 100,000,000 BAC. Don’t forget to add the decimals too, in this case, 18. Click [Write] and pay the fee on MetaMask.
You should now see that the tokens have been minted and sent to the wallet that created the smart contract.
Conclusion
If you decide to make your own cryptocurrency, make sure to use the above information only as a starting point. The topic is extensive and takes a long time to fully and properly understand. Studying other projects and their launches could certainly help with creating and managing a successful cryptocurrency, whether it is a coin or a token.

How do I get my cryptocurrency listed?
If you manage to create and develop a solid cryptocurrency project, you can fill in Binance’s online application forms for either a direct listing and/or distribution on Launchpad/Launchpool. Getting your coin or token listed on a cryptocurrency exchange like Binance can introduce it to a broader audience in a safe and regulated way.
Every cryptocurrency goes through a rigorous due diligence process, and you’ll need to update Binance regularly on your progress during the application. You’ll also need to accept BNB and BUSD in your cryptocurrency’s ecosystem, such as providing them as liquidity or accepting them during your initial coin offering (ICO) or token sale.
How much does it cost to create my own cryptocurrency?
The costs involved are linked to the methods and setup you choose. If you’re creating a coin and blockchain you’ll likely have to pay a whole team over multiple months. A code audit from a reliable team can also cost around $15,000 (USD). At its cheapest, a simple token on BSC can be done for $50. When we average this out, to create a cryptocurrency with some chance of success, you’ll likely need to spend thousands of dollars on its creation, marketing, and community building.
What is a cryptocurrency?
A cryptocurrency, or crypto, is a type of digital asset with multiple use cases. It’s primarily a way to transfer value between people digitally, including monetary value, ownership rights, or even voting privileges. Crypto differs from other digital payment systems because of its roots in blockchain technology. This basis gives cryptocurrencies more freedom from central entities like governments or banks.
Bitcoin is the most famous example of a cryptocurrency. It has a simple use case of transferring monetary value to anyone across the globe without the need for intermediaries. Its blockchain records all transactions and ensures security and network stability.
What’s the difference between crypto coins and tokens?
As already pointed out cryptocurrencies can roughly be split into two categories: coins and tokens. Coins have their own native blockchain, like Bitcoin, for example. Ether (ETH) has the Ethereum blockchain. Coins typically have a specific utility over the whole network, like paying for transaction fees, staking, or taking part in governance. Tokens are built on pre-existing blockchains. They might have some similar roles to coins, but tokens mainly have utility in their own projects. One example is PancakeSwap’s CAKE on Binance Smart Chain. You can also use it to pay for certain transactions in the PancakeSwap ecosystem, like minting Non-Fungible Tokens or playing their lottery. However, CAKE doesn’t have its own blockchain, so it cant be used in every application across BSC. The same is true for the thousands of ERC-20 tokens issued on the Ethereum blockchain. Each token is part of a specific project with different use cases.
Can you summarize the difference between a coin and a token?
Coin
Token