


You’ve probably heard a lot about NFTs lately, especially in the media that reported selling some of them for millions of dollars. Can you also create one and put it up for sale? We will see it in this short guide. Meanwhile, with NFT (short for Non-Fungible Token) we mean a digital certification that certifies the originality and authenticity of particular media content. Whether it is photos, illustrations, videos, songs, or even artwork, an NFT certifies the uniqueness of that particular content and the fact that it is not exchangeable with others. On the contrary, a bitcoin is a “fungible” token, since it is exchangeable with any other bitcoin without affecting its value. An NFT is not, as it is unique and with a specific value. This feature has made its way into the hearts of collectors and fans of digital art, as well as fanatics of the latest trends, increasing the popularity of this technology.
In short, these certificates are nothing more than strings of code, a series of bits inserted into a file to be minted in case of sale. These NFTs are in fact sold regularly every day and in some rare cases even cost millions of dollars. These transactions are regulated through technologies related to the blockchain and through the use of decentralized cryptocurrencies such as Ethereum, which is the usual virtual currency of choice when it comes to the sale of NFTs. Apart from the direct sale of an item as a piece of digital art, there are other possible use cases. For example, a ticket for a particular show or concert, or match could be minted and resold as memorabilia. A video game or content available in it like a skin or a weapon could be made available in this way.
However, in most cases, the minting of a Non-Fungible Token has a cost, as it requires the payment of a gas fee, in order to pay the energy costs incurred by the blockchain. This is a fee that could be worth hundreds of dollars for every single NFT to be minted. Certainly an affordable investment for established artists, but not that much for newbies. However, there are platforms that can do this at no cost.
OK, let’s stop dwelling now, and let’s start our short guide.
Step 1: Create the content for NFT
First of all, you need to create a piece of content that you can turn into NFT and then sell. As said, the range of multimedia content in which these NFTs can be minted is wide.
As for images and photos, for example, if you use Photoshop, you could create a photomontage (with images you own the right to use obviously) and illustrations as you normally would and then turn your work into an NFT. As an alternative, you can always opt for other programs to create images, perhaps free, such as GIMP.
Obviously, for each content, be it video, audio, etc., there is also a specific program that can satisfy your needs and requirements.
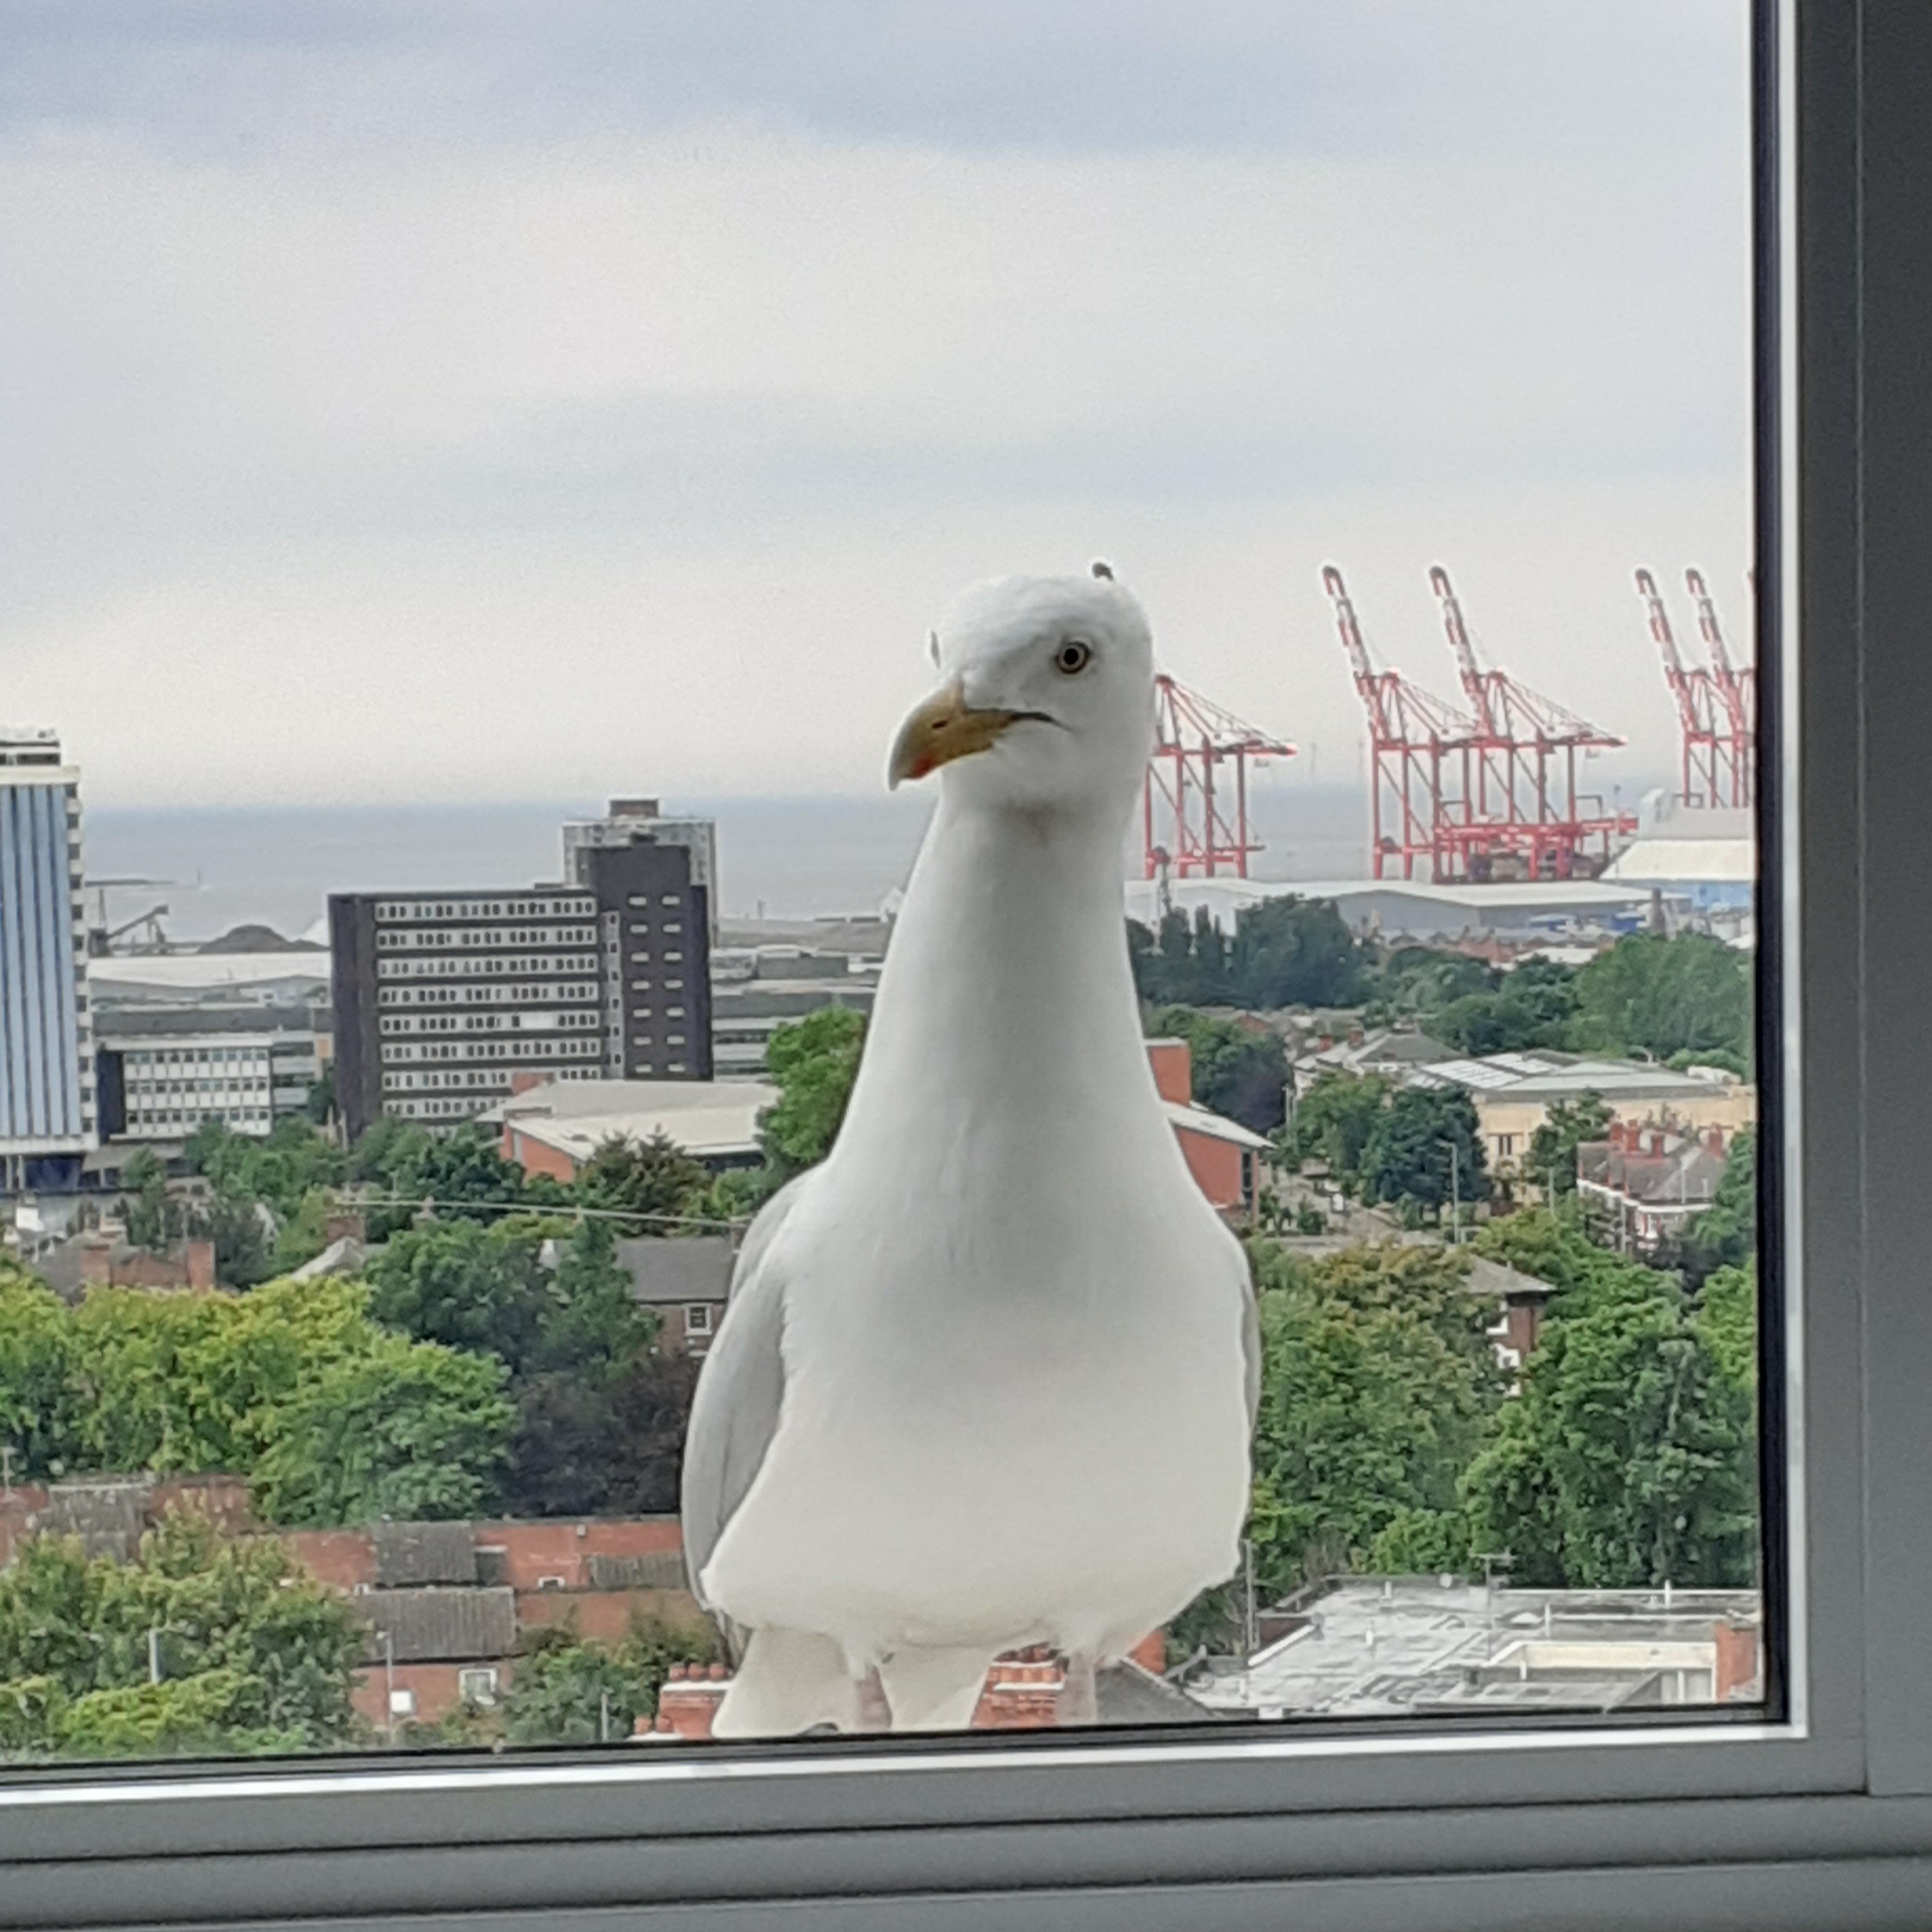
For the scope of this tutorial, I will use the picture of a friend who comes daily to check what I’m doing, and I’m going to make an NFT out of it.
Step 2: Create a crypto wallet for NFT
Since these are content that can be purchased via blockchain, it is not possible to buy NFTs with traditional currency and you will need at least a crypto wallet to be able to access the trading platforms and be able to manage any earnings you will make by selling your works.
For this tutorial, I will use MetaMask, one of the most used crypto wallets in the field of NFTs and beyond. The peculiarity of MetaMask is its offline nature, allowing you to access your account at any time and ensuring the highest level of security possible.
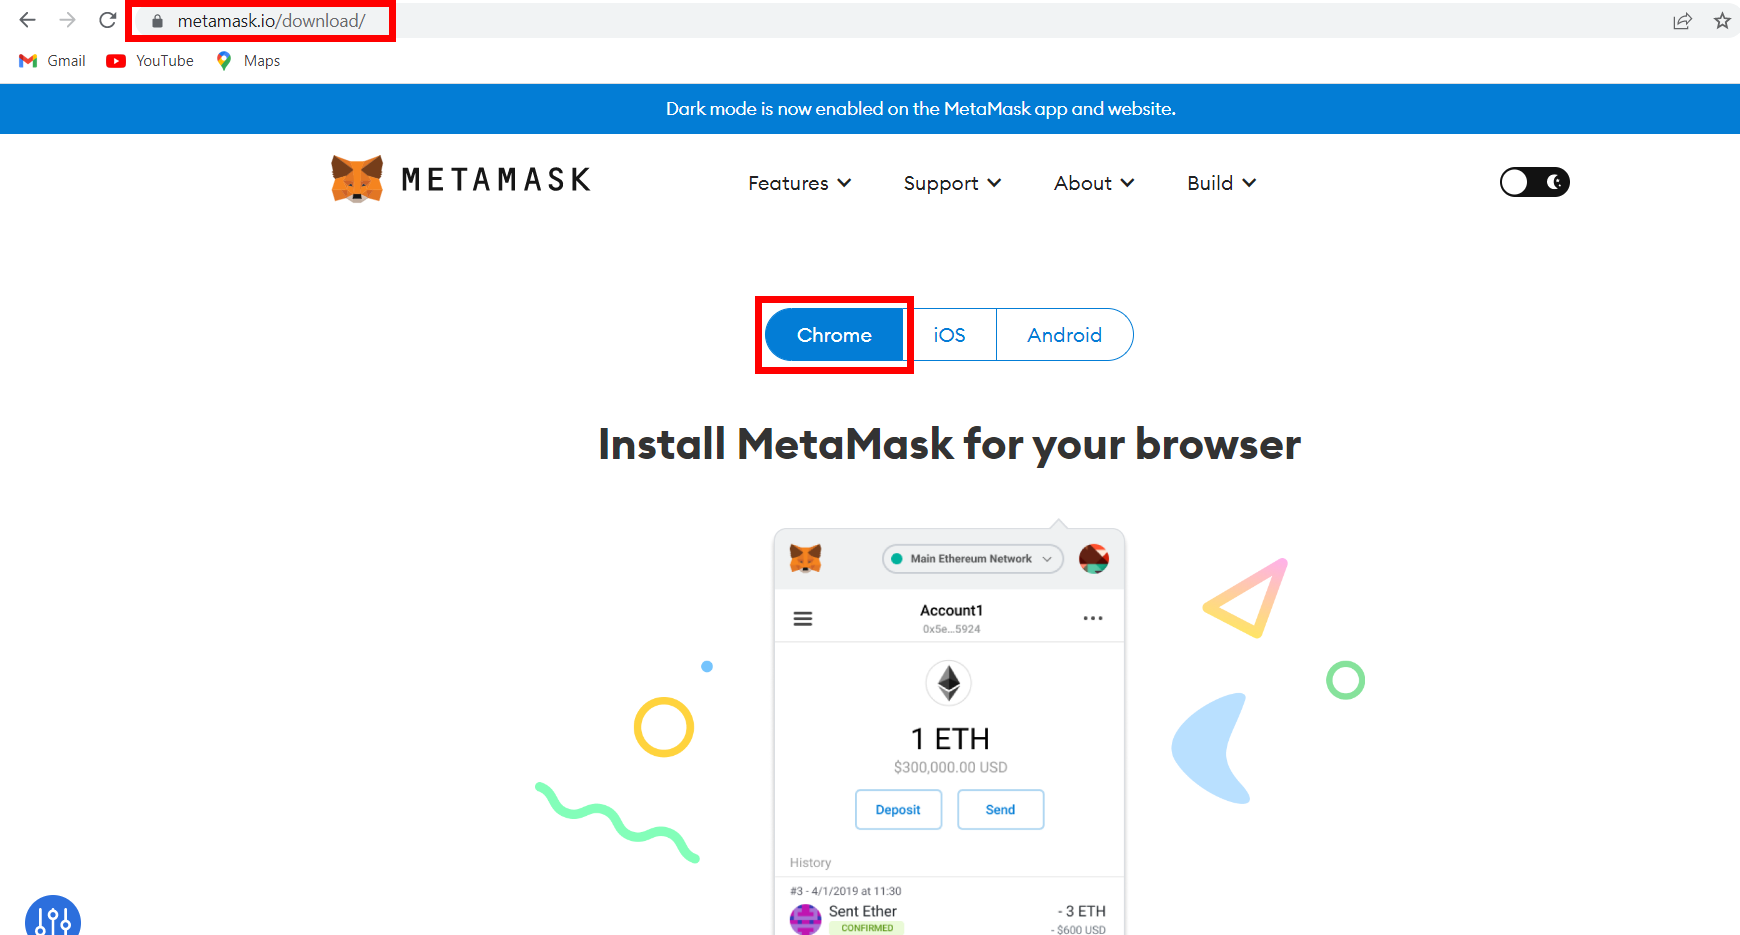
To download MetaMask, connect to the official website and click on the Download button to view the platforms compatible with this crypto wallet. MetaMask is available on smartphone operating systems such as Android and iOS, as well as being installable as an add-on for Google Chrome, Mozilla Firefox, and Microsoft Edge browsers. In the latter case, since the extension requires very high permissions in order to function and, therefore, could potentially read all the activities you carry out in your browser, I recommend that you install it in an alternative browser to the one you use usually, so as to eliminate any potential privacy risk (the service is however reliable and very popular).
Once installed, all you have to do is set an email address and a secure password for your account, and store the secret words dedicated to the account recovery on a sheet of paper (not on your PC or laptop where they can be hacked or lost), and finally, log in to MetaMask to go to the next step.
The use of MetaMask is clearly not mandatory. You can definitely use an alternative crypto wallet if you want to, perhaps one you are already familiar with.
Step 3: Create free NFTs with OpenSea
You have your work of art, and you have a crypto wallet. Now you only lack to showcase it to an audience, you need a platform on which to share and sell your work. As mentioned, there are many platforms that allow the creation and sale of an NFT, but most of these require the payment of a fee for the minting of each token. This narrows your options to very few platforms that can host and resell your creations for free.
Among these, OpenSea, a company founded by Devin Finzer and Alex Atallah in 2017 and headquartered in New York City, is the most popular platform around when it comes to creating free NFTs. Since its founding, OpenSea’s digital market has seen an incredible amount of NFTs appear. In 2021, following a heightened interest in non-fungible tokens, the company’s revenue reached $95 million in February 2021 and $2.75 billion in September of that year. By January 2022, the company had been valued at $13.3 billion and has been considered the largest non-fungible token marketplace. Recently the site has implemented minting through Polygon, a blockchain based on Ethereum and specialized in lazy minting, postponing the creation of the NFT until the time of purchase by the buyer and therefore reducing the cost of the aforementioned to zero tax on blockchain emissions.
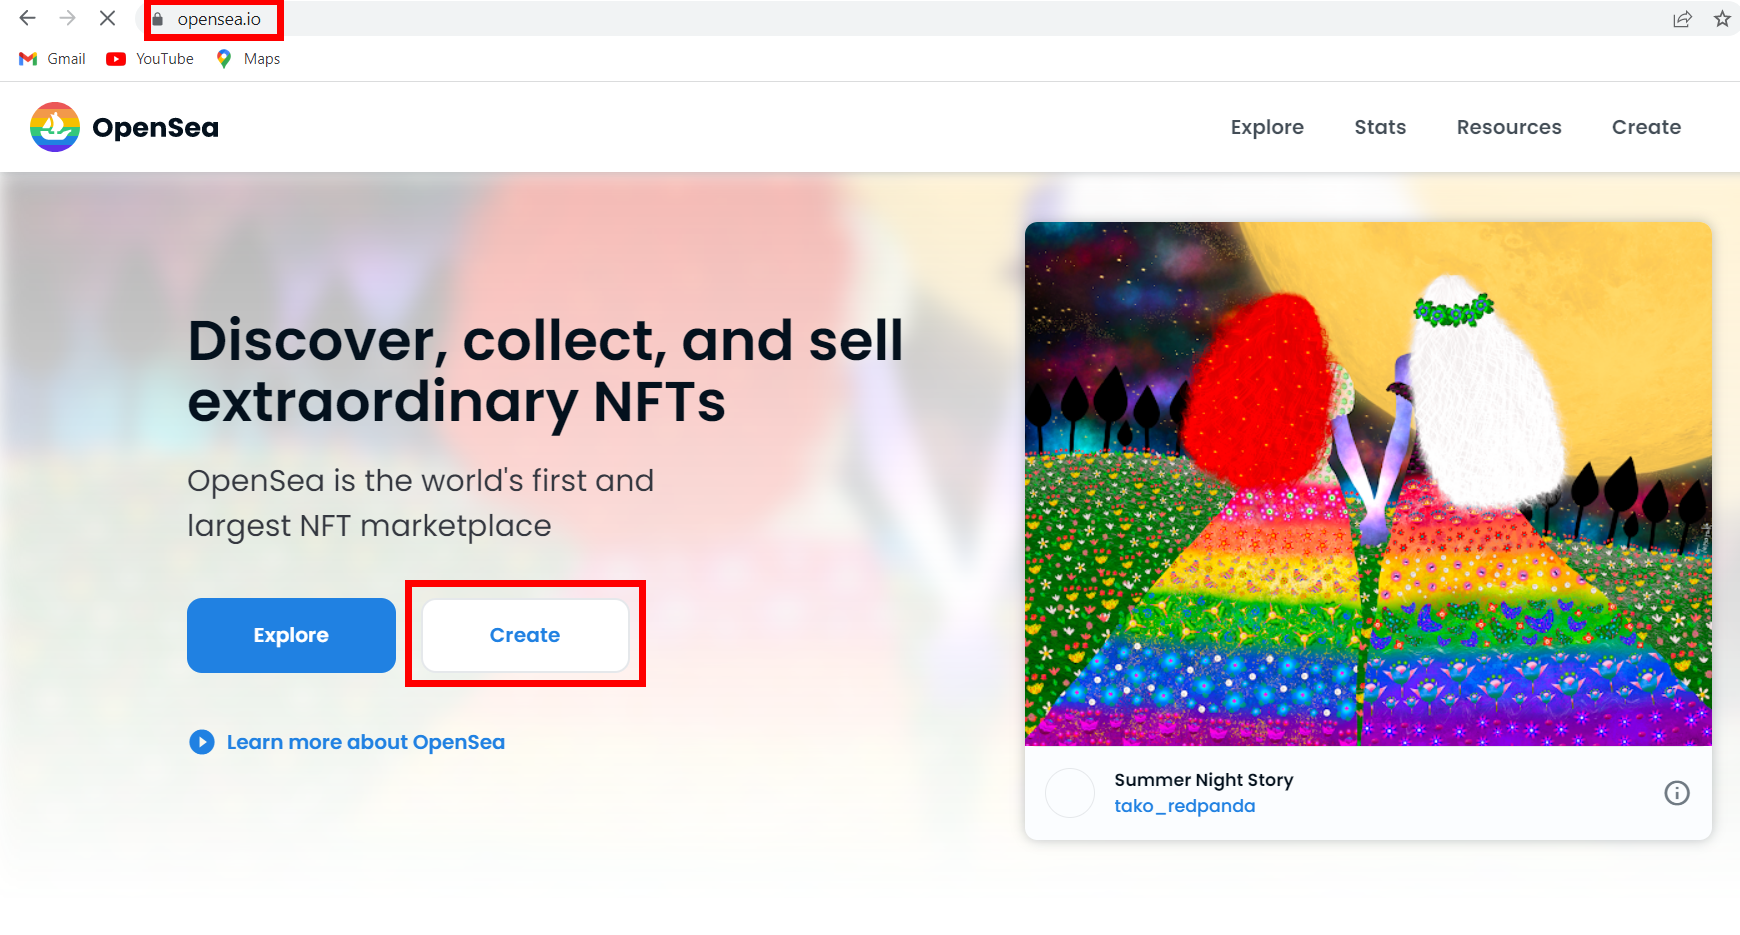
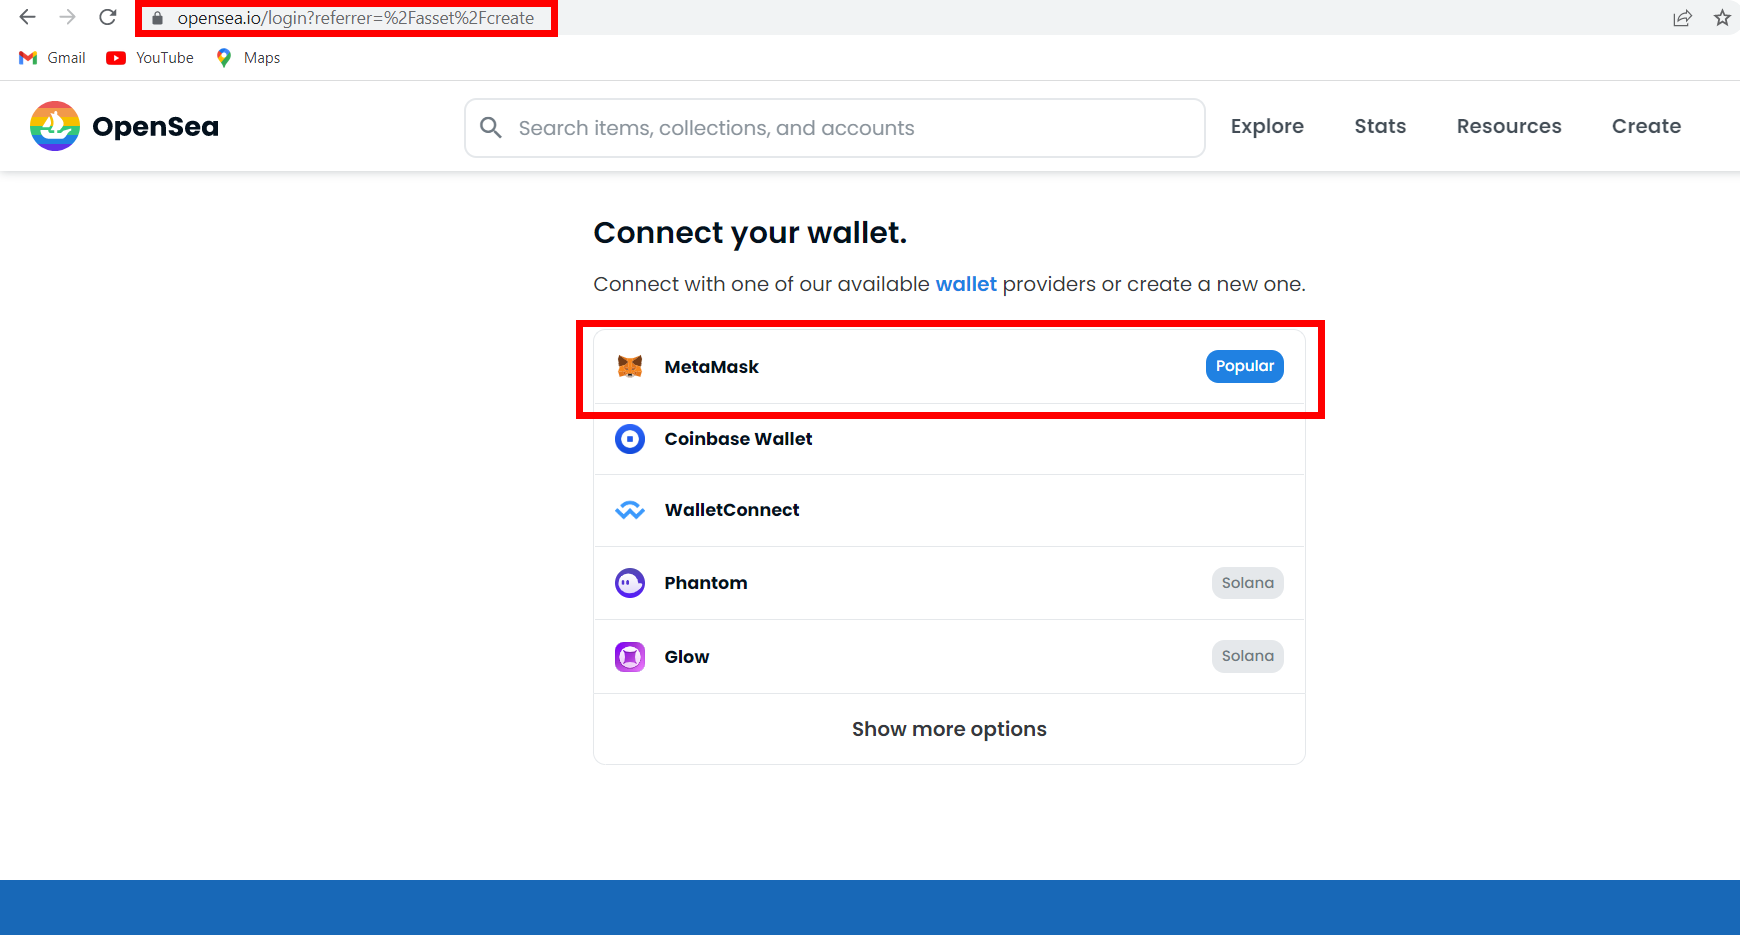
Signing up for OpenSea is very simple. First, connect to the main page of the site and click on the Create button to open the page dedicated to access. From there, select (from the supported ones) your trusted crypto wallet and confirm the connection with the platform.
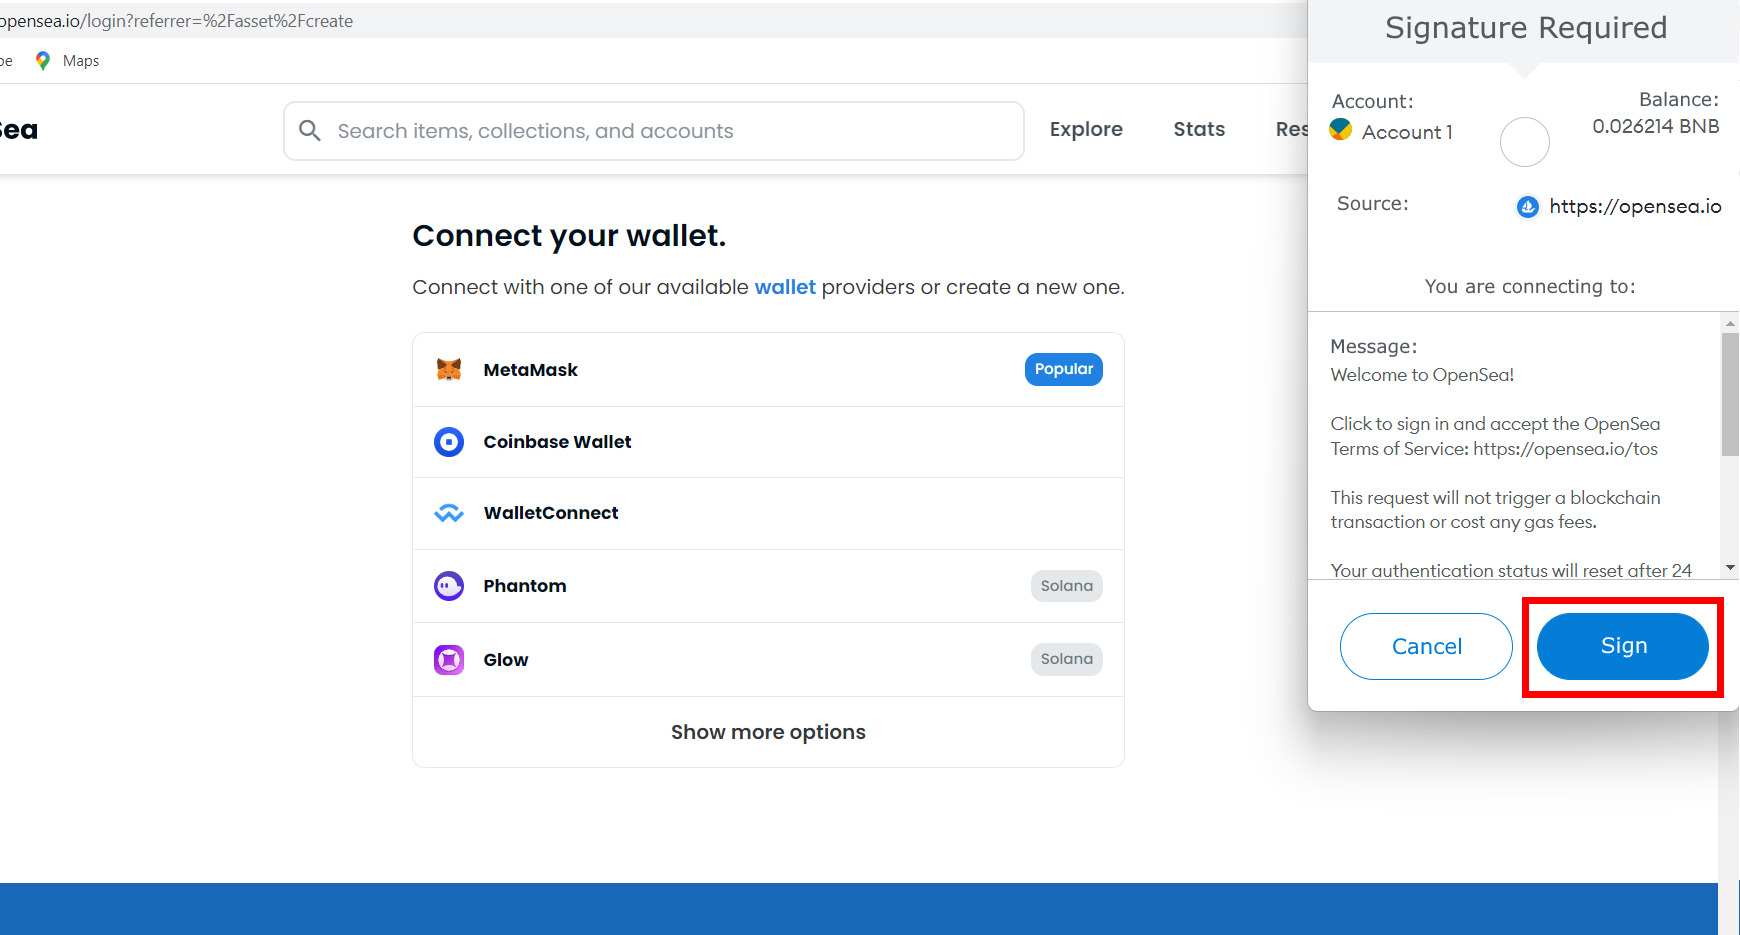
At this point you will be asked, within your wallet, to sign an authentication to accept the terms and conditions of use of OpenSea. Go on and sign.
At this point, you can create your NFT straight away…
… or click on the profile picture to open a small pop-up menu. Within this menu, you can click on various options, such as the classic profile settings and those related to the interface.
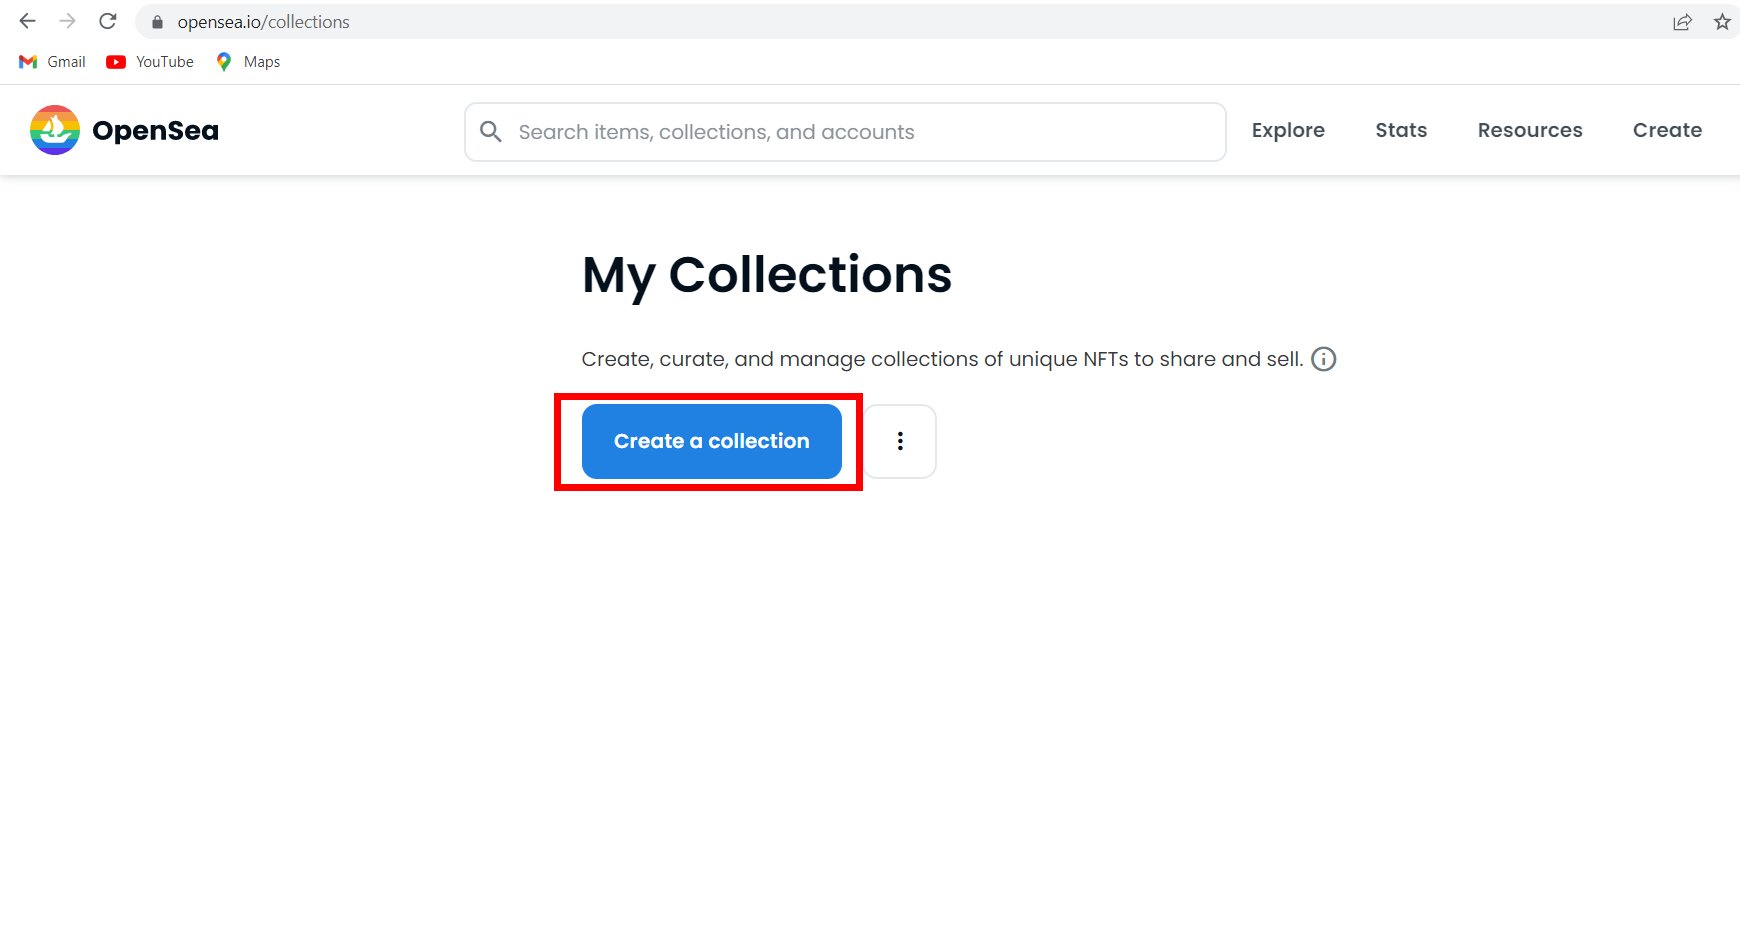
For the purposes of this guide, click on My Collections to enter the page dedicated to the management of your collections of works of art, necessary for cataloging your creations and ordering. Click on Create a Collection to start setting up a new collection. Fill in the appropriate fields by entering your logo, cover, banner, name, custom URL address, and description to easily identify your collection.
As for the non-mandatory fields, I suggest you evaluate the inclusion of a category, some links dedicated to your contacts, and above all the inclusion of royalties, or a small percentage of money that you can earn for every single resale by third parties of your NFT. Once you are satisfied, click on Create to save the collection to your profile.
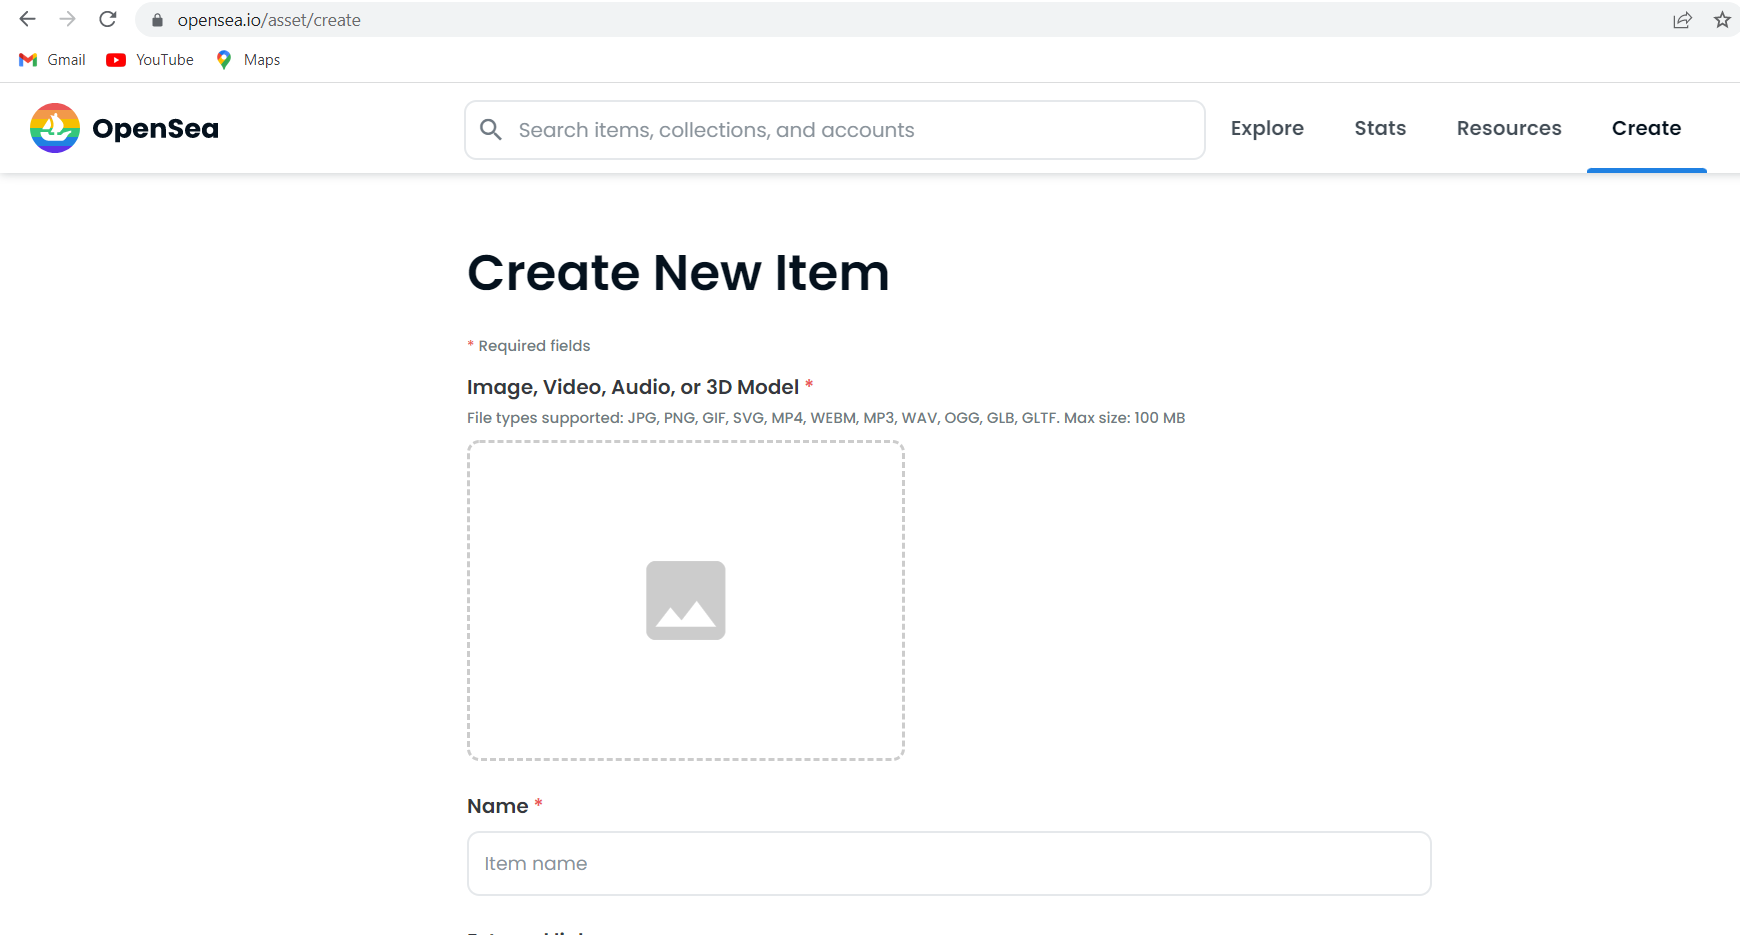
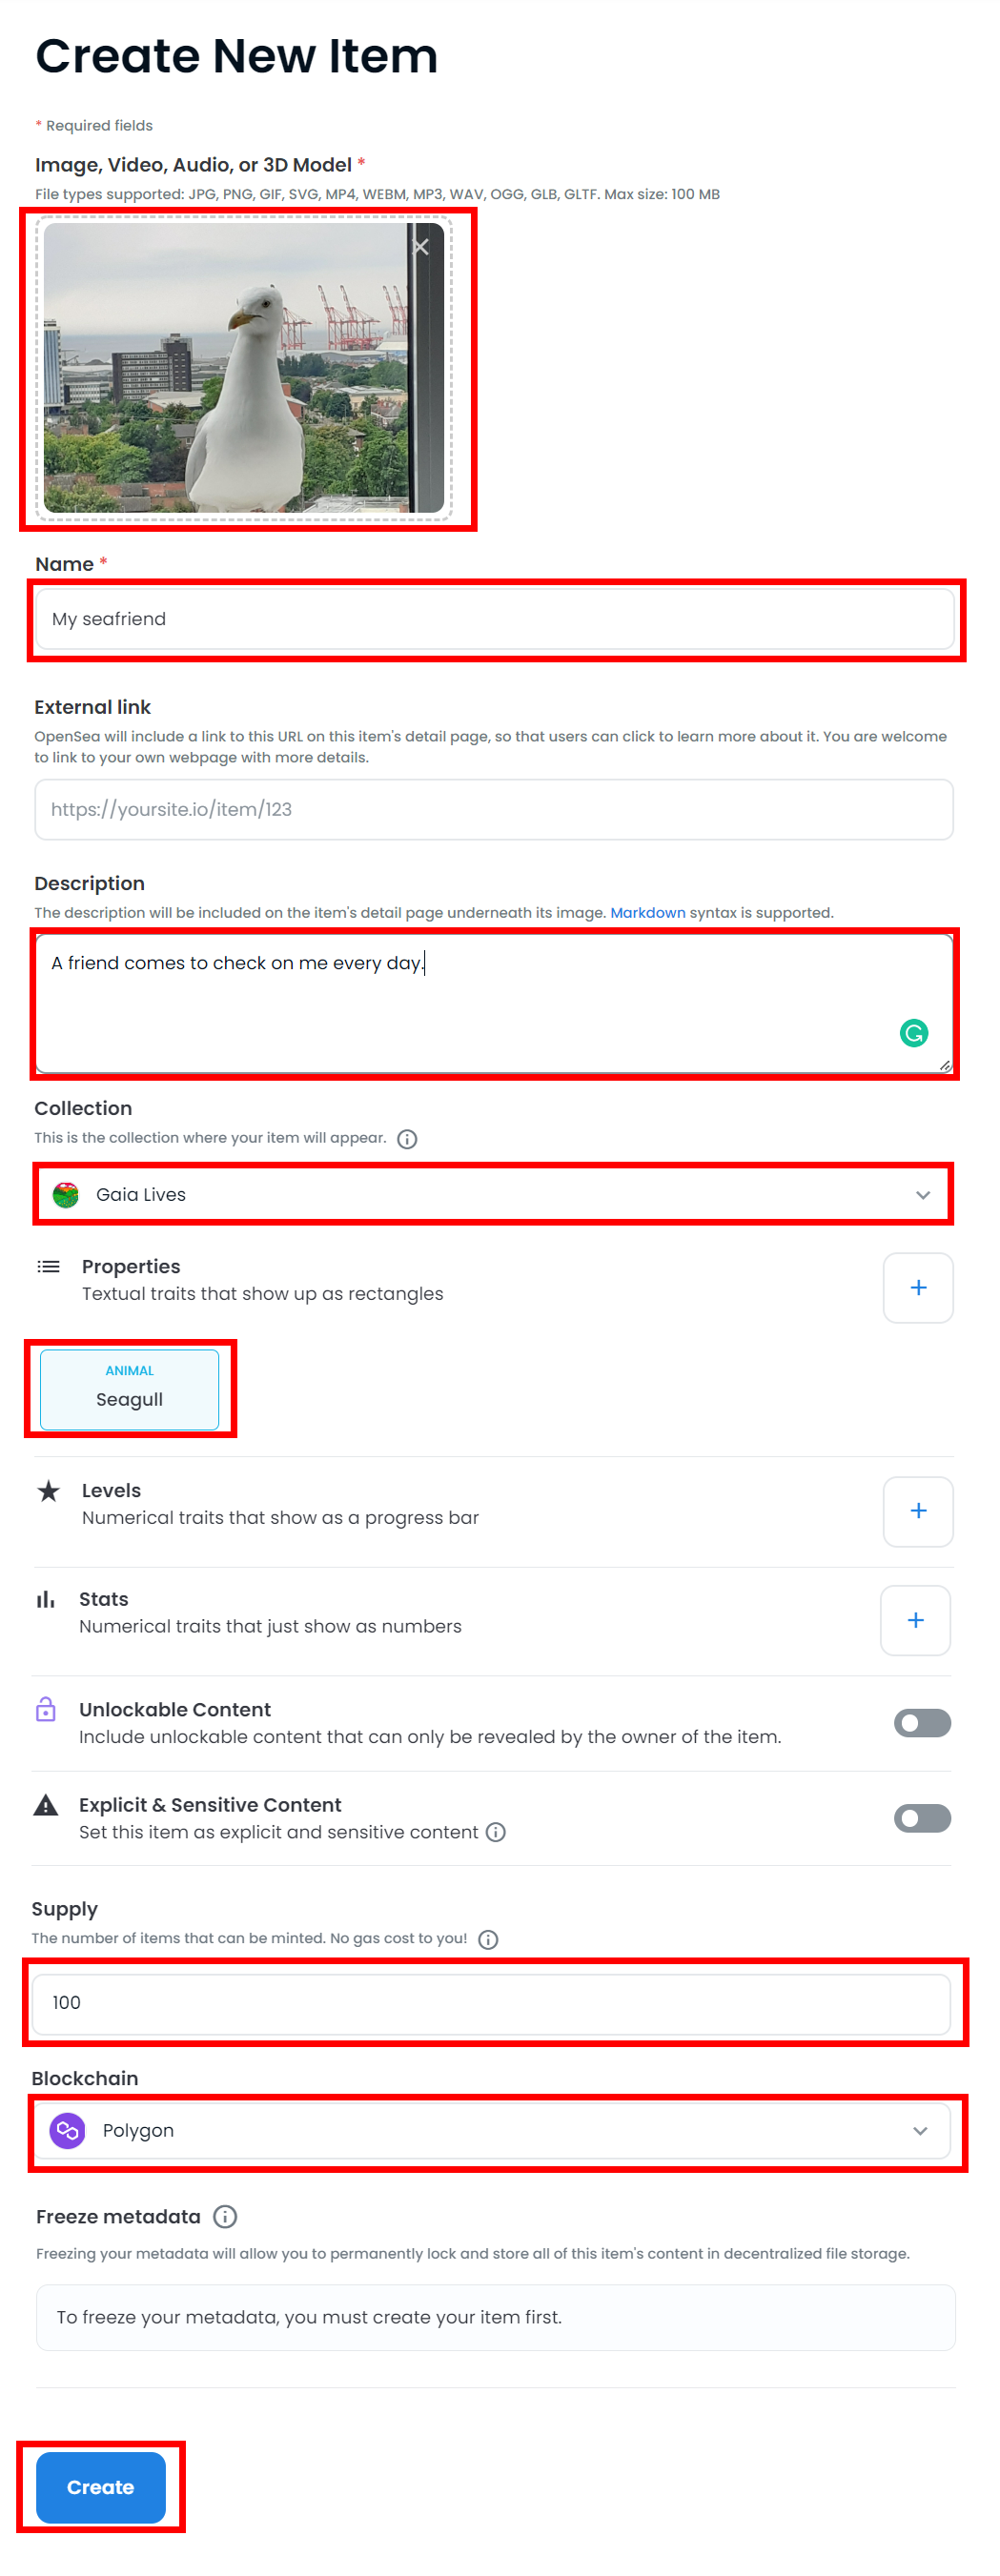
Click again on the Create button at the top right to open the page dedicated to the creation of your first NFT. OpenSea allows the uploading of files in different formats such as JPG, PNG, GIF, MP4, MP3, WAV, and also 3D model files exported to GLB and GLTF. The only limit is the size of a file, which cannot exceed 100 MB.
Next, fill in the available text fields by entering the name of your NFT, a description, and an external link to let users learn more about your work. By clicking on the Select Collection item you can catalog the content in the previously created collection. After that, you have the possibility to set some extra functions, such as the properties of the NFT, its Levels, Statistics to be shown to visitors, exclusive content accessible only once the image has been purchased, or choose whether to set a filter for explicit and sensitive content.
Finally, open the menu under Blockchain and select Polygon to take advantage of the creation of NFTs through this blockchain at no cost. With Polygon it is also possible to select a higher quantity of NFTs to be minted by entering a number in the field under the heading Supply. Once you have set all the necessary information well, click on the Create button to finish.
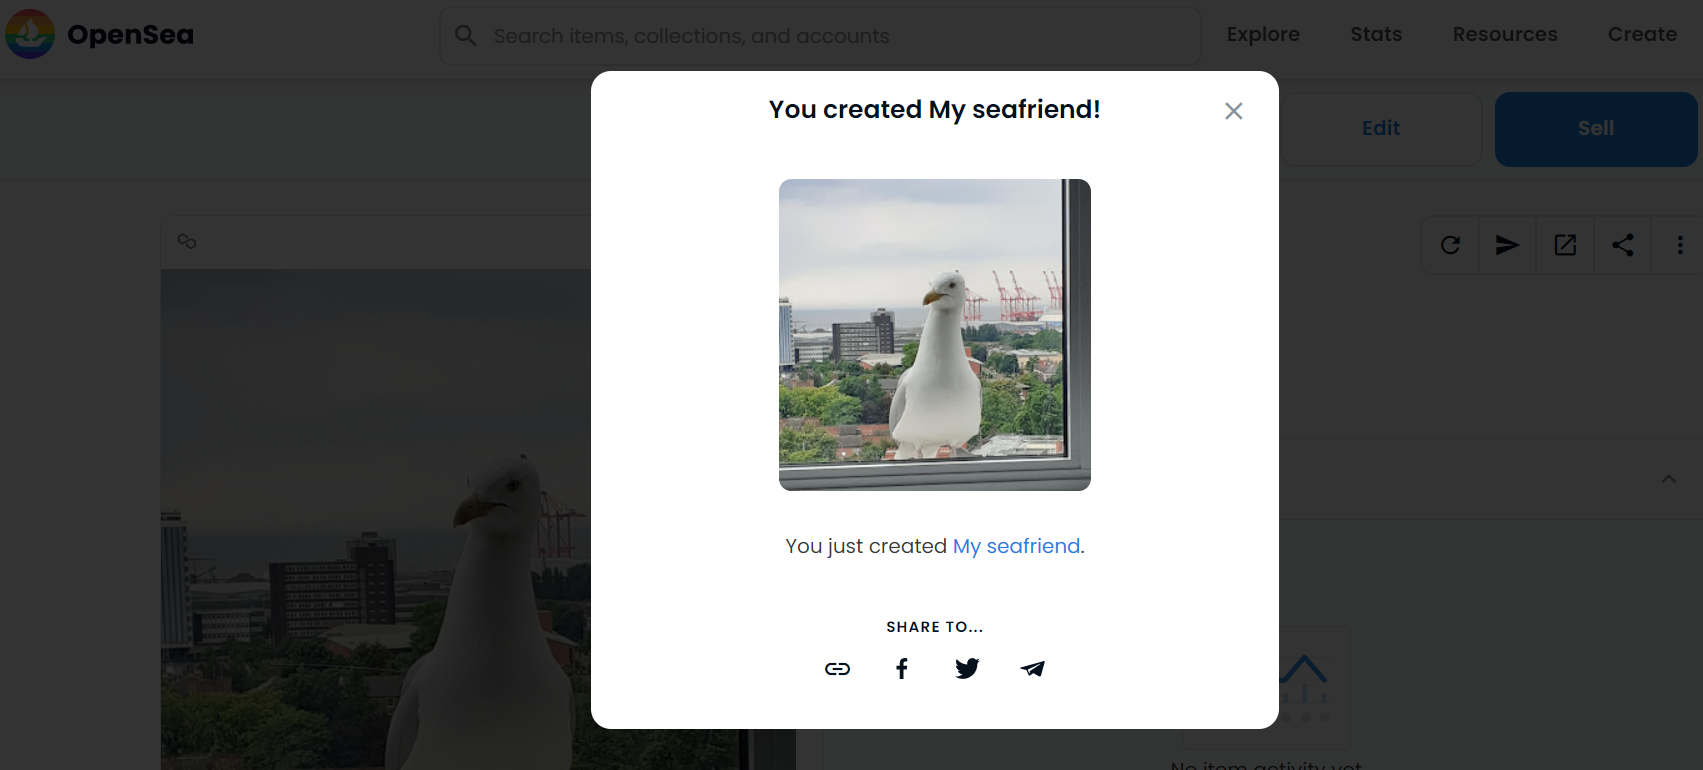
In a moment, the OpenSea system will finally have generated your first NFT.
It will have a dedicated page like this: https://opensea.io/assets/matic/0x2953399124f0cbb46d2cbacd8a89cf0599974963/25019938661392039101938289698509389351115812927265334180252011245034973167716/
Now you just have to sell it! Click on Sell to open the page dedicated to your listing.

Enter the item quantity (leave “1” if you want to sell one at a time), and the price in Ethereum, and set the duration of the listing for sale. To price your work right, I suggest you browse OpenSea for some time and see how much, on average, work similar to yours is quoted.
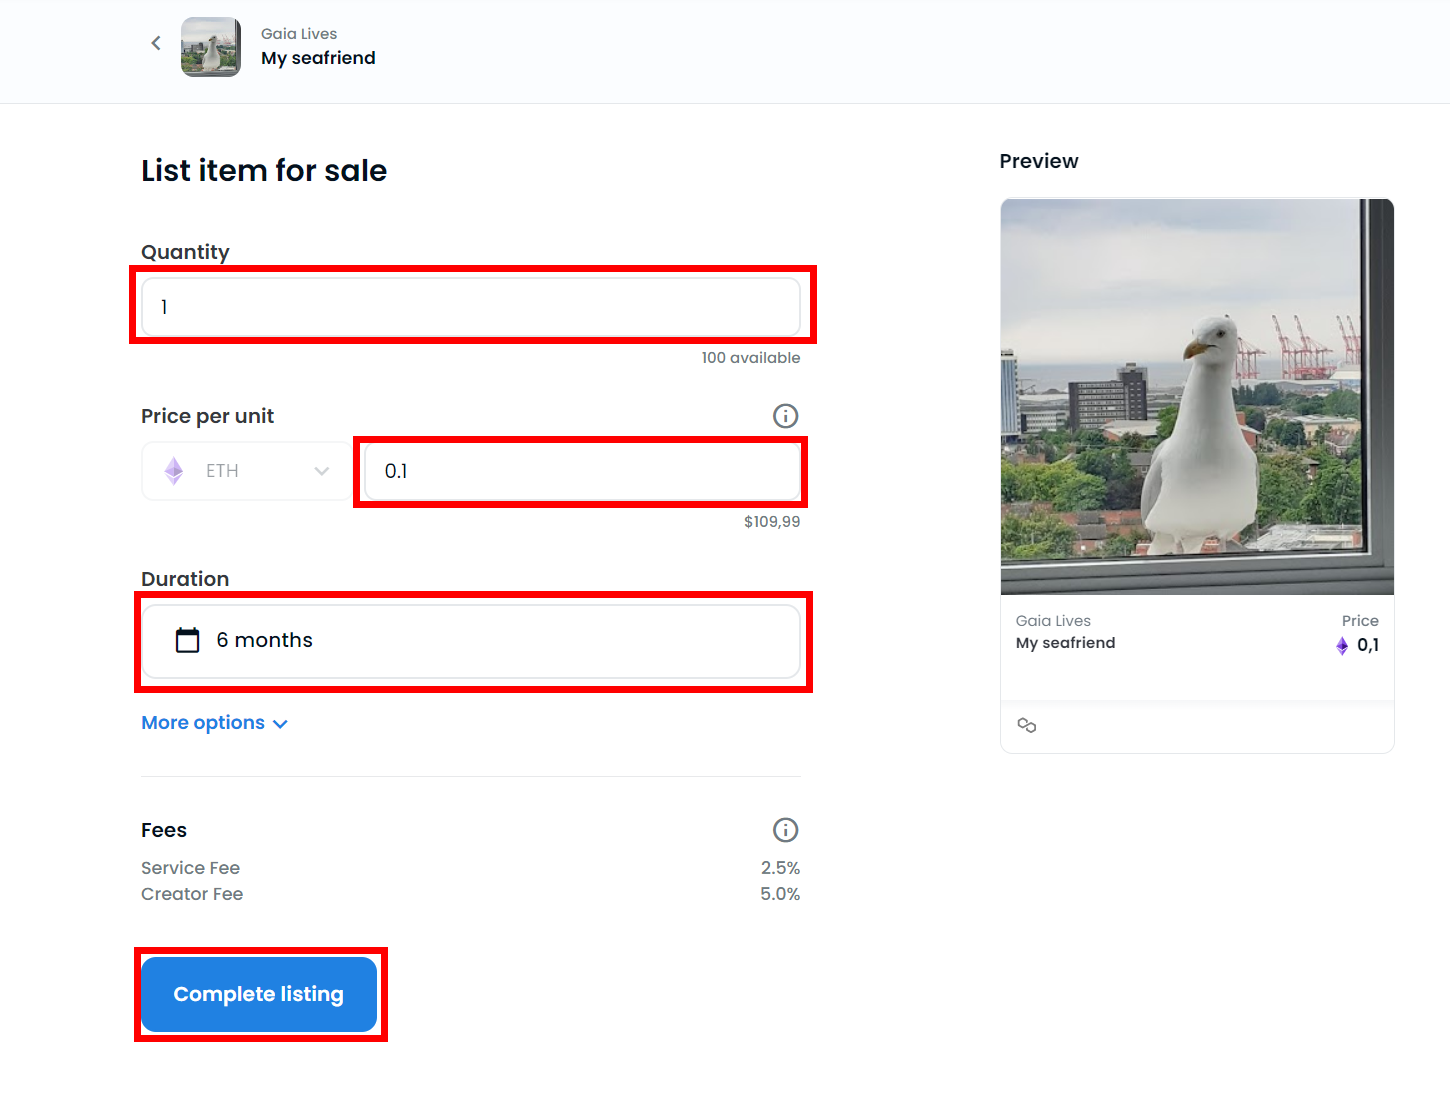
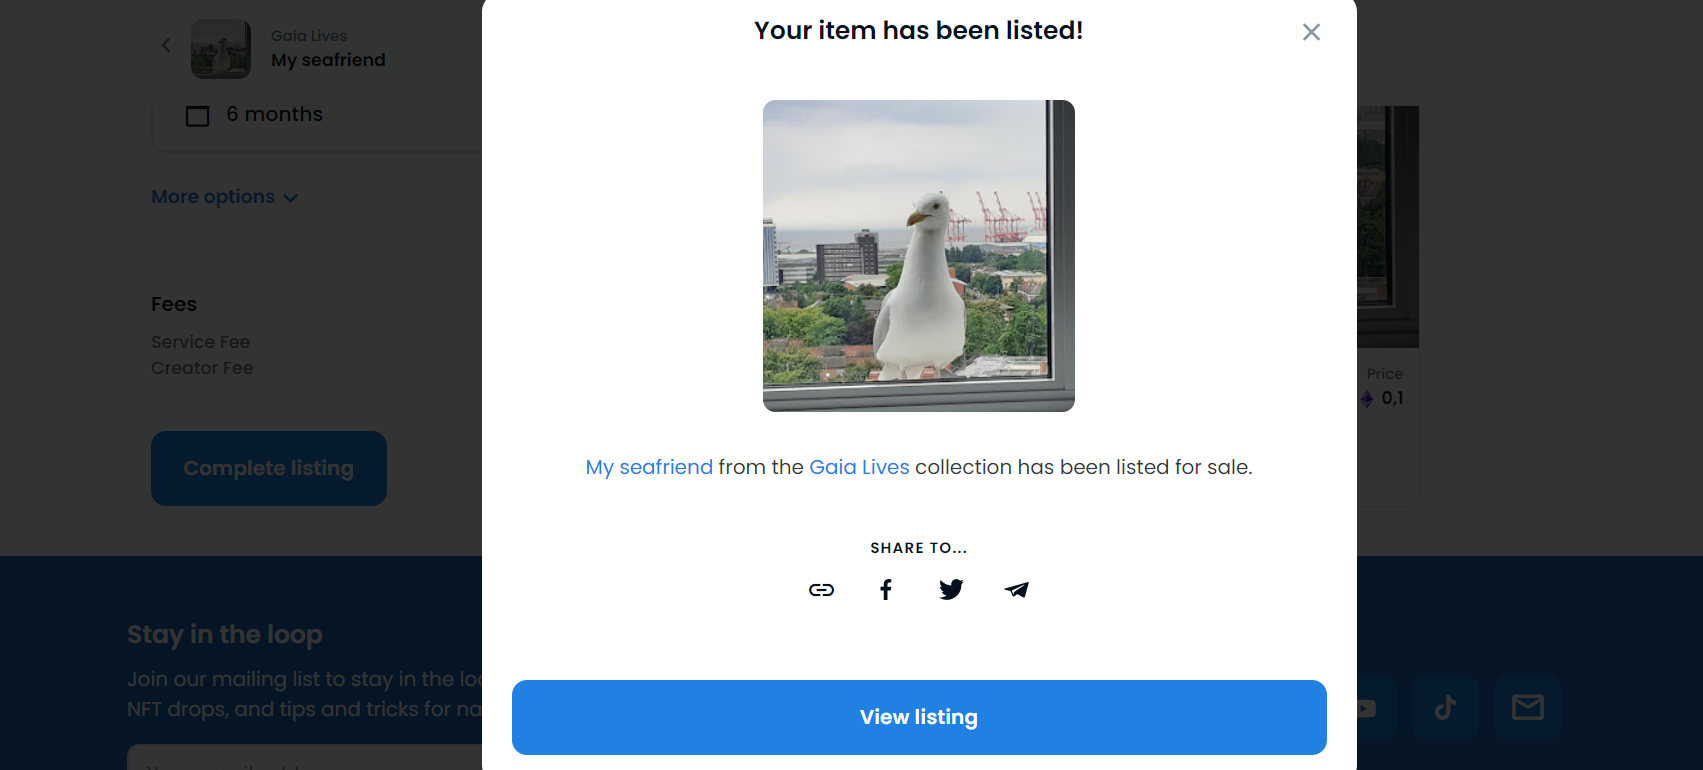
Finally, click on Complete Listing. A screen dedicated to the validation of the operation will open. As this is your first operation on OpenSea, you will need to click on Unlock and accept a confirmation transaction with no value to enable your crypto wallet for sale. Next, click on Sign to sign your NFT for sale. And here it is! You have just listed your first NFT on OpenSea for free!
This is obviously just a basic overview of what is possible with OpenSea. For in-depth details, features, and resources, I recommend that you consult the official help center (https://support.opensea.io/hc/en-us).
Other platforms to create NFTs
In this guide you have learned how to create a free NFT through the OpenSea platform, however, there are other alternatives, but they are not usually free. Nevertheless, they are certainly worth mentioning. Among others, they include:
Featured (www.featured.market) is a platform for the creation of NFT managed by Binance that allows you to manage and sell your works after paying a fee using the BNB cryptocurrency.
Rarible (www.rarible.com) is a free platform dedicated to creating NFTs without having to pay the tax for emissions, using the lazy minting blockchain created by the platform.
SuperRare (www.superrare.com) is a platform dedicated to artists, content creators, and collectors, allowing them to use the Ethereum blockchain to create, collect and sell their NFTs.

[…] If you are interested in creating an NFT, Virtual Grub offers here a simple guide to creating a free NFT. […]
[…] You’ve probably heard a lot about NFTs lately, especially in the media that reported selling some of them for millions of dollars. Can you also … Read more: How To Create A Free NFT In 3 Easy Steps […]