


We created this brief guide as we think it can be useful as a first step for building any application dealing with shopping or logistics.
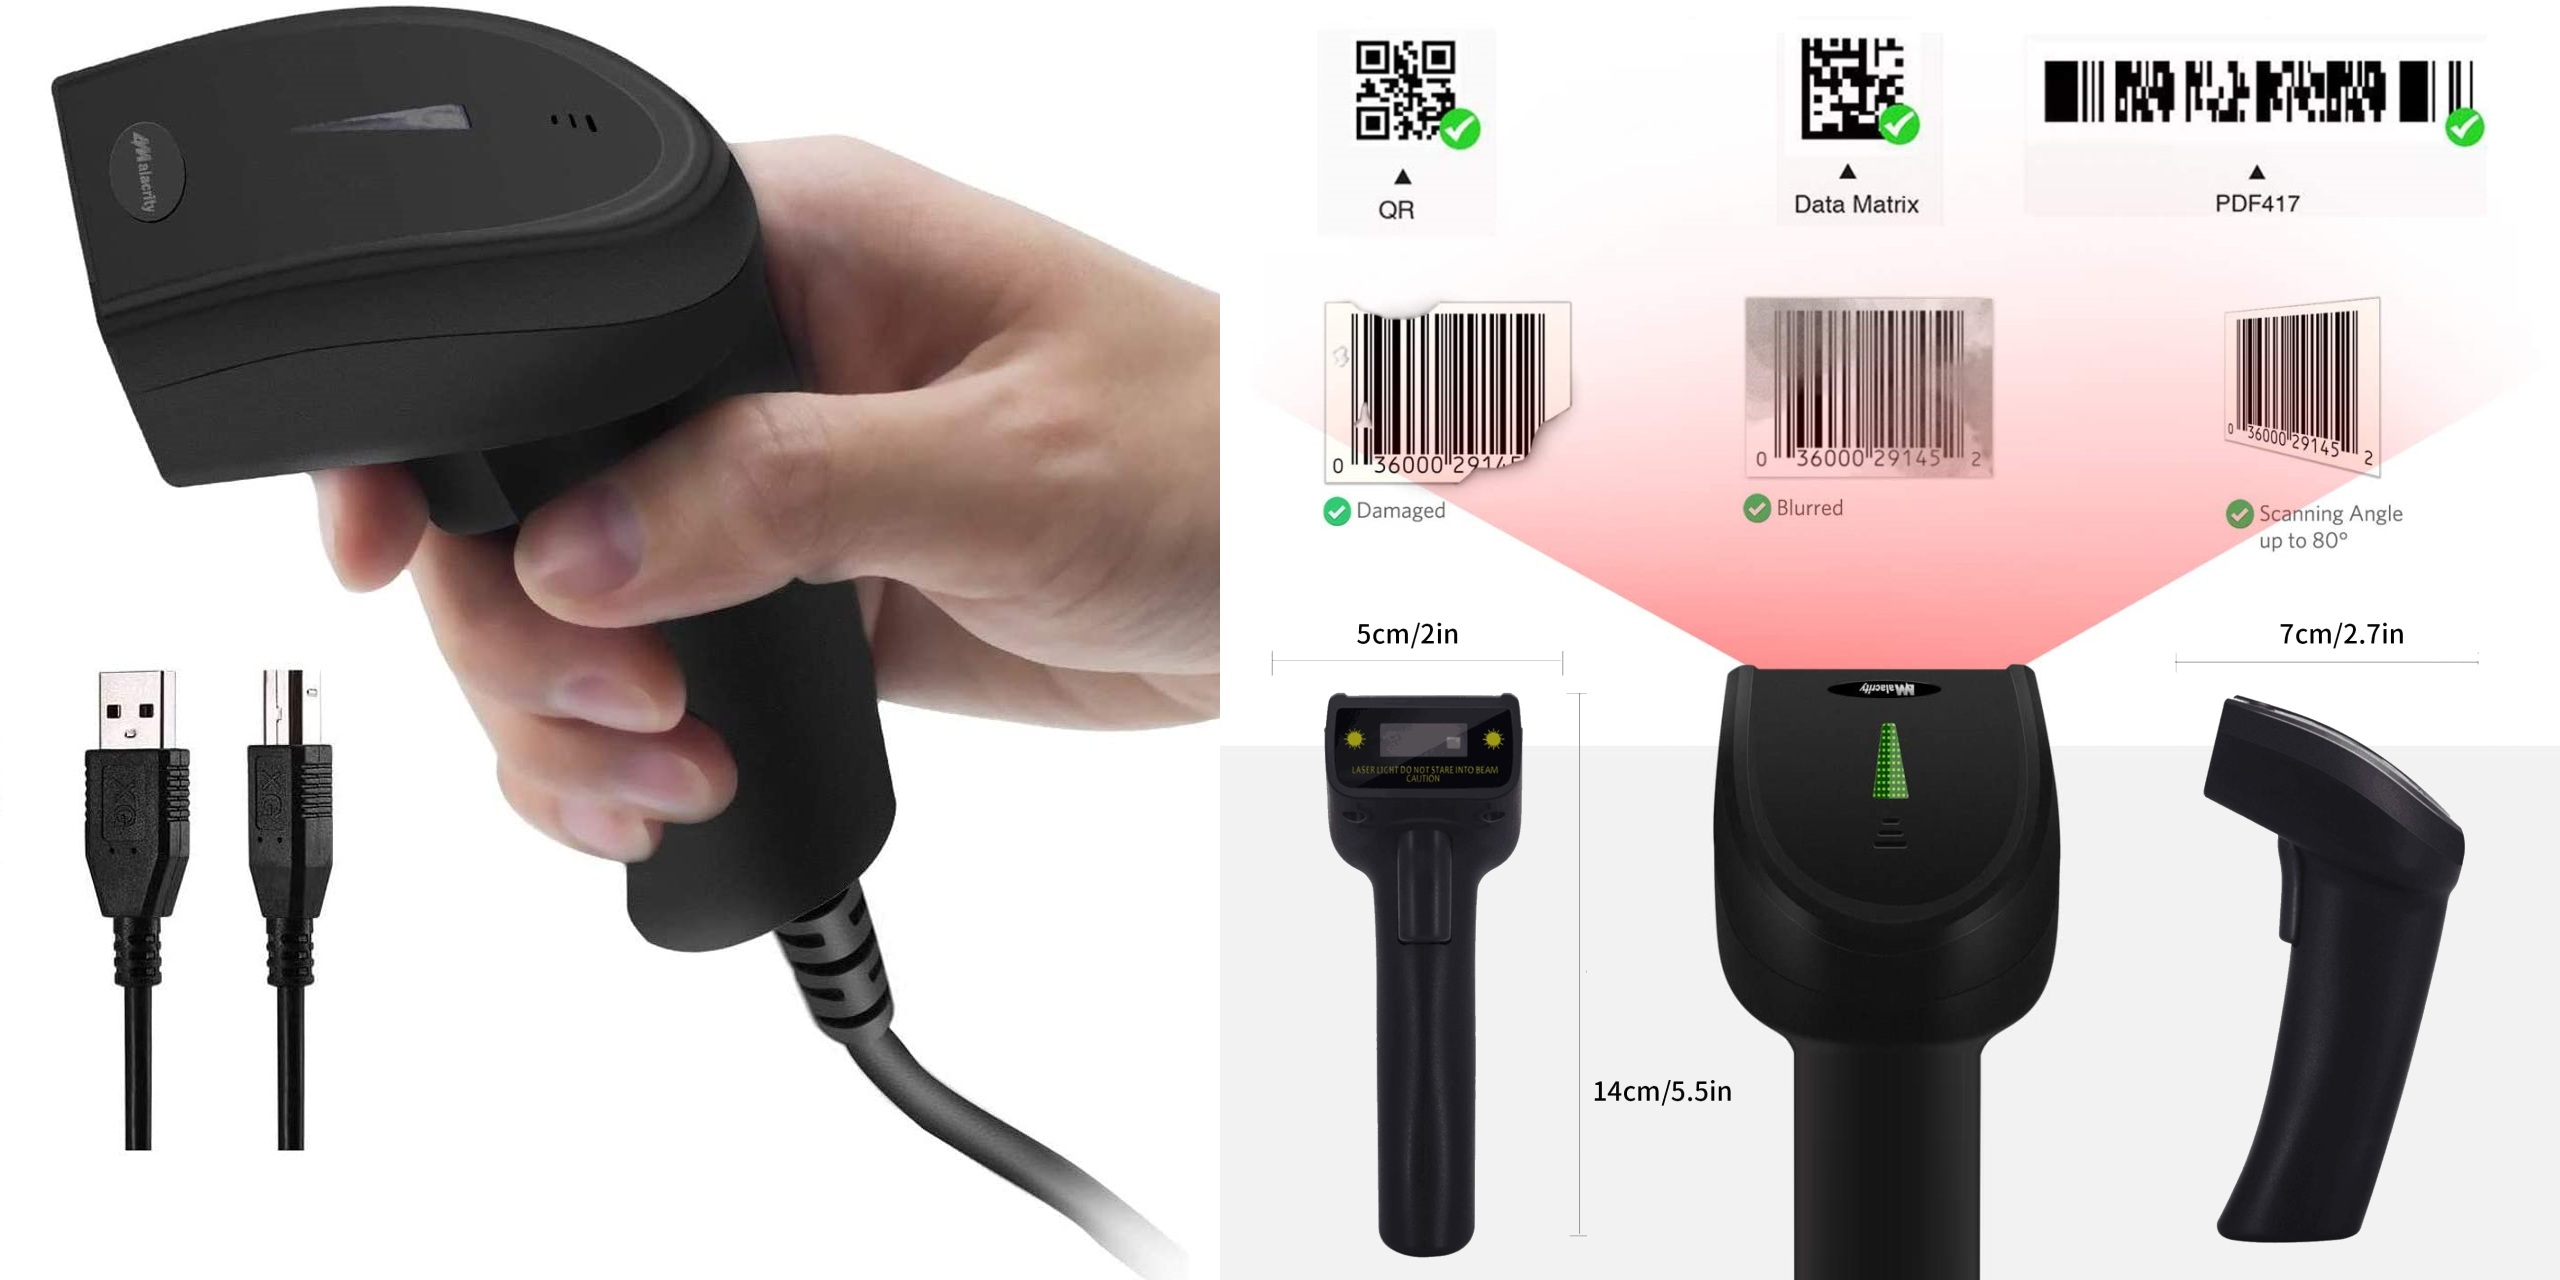
We use the Alacrity 2D 1D Wired Barcode Scanner for this guide. Its price is £19.99 on Amazon UK at the time of writing. You can actually use any other model for this exercise, like the
Bluetooth and wireless scanner or the omnidirectional hands-free scanner from the same company and available on Amazon US.
Our scanner in brief:
- Power source: Corded Electric
- Brand: Alacrity
- Connectivity technology: USB Cable
- Number of batteries: 1 Lithium-Ion battery (included)
This device is certainly cost-effective since it is available for a low price without compromising performance or features. It can be used in retail shops, clothing stores, supermarkets, libraries, book stores, pharmacy stores, warehouses, etc., and significantly reduce data entry errors. It also boasts a shockproof design as a good additional feature.
It is extremely easy to use, it is a plug & play device, and hence there is no need to install any software or app. You can easily connect it to your laptop, PC, or POS through its USB cable and it will be up and running.
It can read printed codes and screen images for maximum usability. It can easily capture all common 2D (QR, Datamatrix, PDF417, Aztec, Maxicode, etc.), and 1D (UPC/EAN, Code39, Interleaved 2 of 5, Code93, Code 128, Codabar, Industry25, Matrix25, etc.) codes. Even blurring, or incomplete barcodes can be decoded and uploaded very quickly.
This is a very short guide. The few steps given are very straightforward. Let’s start.
Our model is composed of some files:
- index.html – the core file, the one to call, and the one that will interact with the barcode scanner
- style.css – the stylesheet of the page
- script.css – the QR code reader
- qr_packed.js – an external library from GitHub
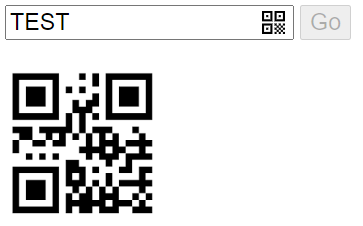
- qr-code.png – an example QR code that just reads “TEST”
- qr_icon.svg – an icon that shows in the input field. Clicking on it, it will allow uploading a QR image to read.
Step 1: Create the index.html file.
<!DOCTYPE html>
<html lang="en">
<head>
  <meta charset="UTF-8">
  <title>Barcode reader demo by Virtual Grub</title>
  <link rel="stylesheet" href="./style.css">
</head>
<body>
  <input type=text size=16 placeholder="Tracking Code" class=qrcode-text>
  <label class=qrcode-text-btn><input type=file accept="image/*" capture=environment onchange="openQRCamera(this);" tabindex=-1></label>
  <input type=button value="Go" disabled>
  <br><br>
  <img src="qr-code.png" width="125"/>
  <script src='https://dmla.github.io/jsqrcode/src/qr_packed.js'></script>
  <script  src="./script.js"></script>
</body>
</html>
Step 2: Create the style.css file.
body, input {font-size:14pt}
input, label {vertical-align:middle}
.qrcode-text {padding-right:1.7em; margin-right:0}
.qrcode-text-btn {display:inline-block; background:url(qr_icon.svg) 50% 50% no-repeat; height:1em; width:1.7em; margin-left:-1.7em; cursor:pointer}
.qrcode-text-btn > input[type=file] {position:absolute; overflow:hidden; width:1px; height:1px; opacity:0}
Step 3: Create the script.js file.
function openQRCamera(node) {
  var reader = new FileReader();
  reader.onload = function() {
    node.value = "";
    qrcode.callback = function(res) {
      if(res instanceof Error) {
        alert("No QR code found. Please make sure the QR code is within the camera's frame and try again.");
      } else {
        node.parentNode.previousElementSibling.value = res;
      }
    };
    qrcode.decode(reader.result);
  };
  reader.readAsDataURL(node.files[0]);
}
Step 4: Connect the barcode scanner to your laptop or PC through the USB cable.
Step 5: Read the QR code example.
That’s it. You are now ready to make more complex applications. Using MySQL and PHP you can for example develop a web application that manages the sales and inventory in a bookshop.
No Comment