


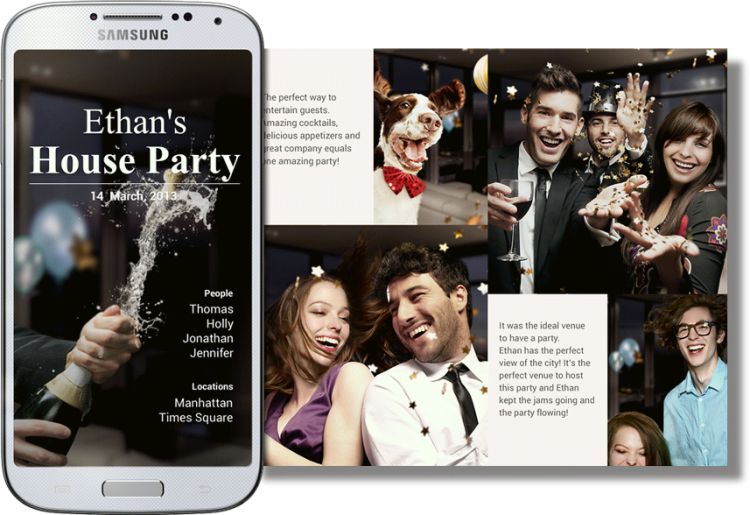
Import your images from the Gallery app into customisable photo albums using Story Album
Choose an album type
Story Album is Samsung’s answer to quick and easy album creation on your Galaxy device. When creating a new album you’ll be able to import images straight from the Gallery app into it. If you make a habit of tagging your images you’ll also be able to bring in photos by their tags, helping you create albums that include specific people, places and things. When creating a tag-based album, you can use Google Maps to identify a specific location where photos were taken that you want included, as well as setting up specific time frames for images. From the Story Album creation menu you can also create albums by suggestions from the app.
Through the suggestion option the app will group together images by their date and location, helping you to set up an album in no time. After tapping ‘Create album’, tap ‘From suggestions’. You’ll then need to set up a Home location for your device if you haven’t already. This can be done in your location settings, where you’ll need to use a map to set your home point. Once you’ve compiled your images for an album, you’ll find a bunch of great tools available through the app to edit, arrange, title and share your photos however you want.
Make albums your own
It’s worth exploring Story Album’s settings before you get started. From the app’s home screen, tap the Menu button and then Settings. Here you’ll be able to select extra content which can be added to your albums, such as Facebook check-ins and weather information. Under the settings’ ‘Other’ subheading you’ll be able to switch on a motion gesture to refresh a page’s layout, as well as turning on tagging and notification options. Albums within Story Album can be modified and adapted in a number of ways.
On creating an album, you’ll want to select a theme to work with from the six on offer. Different themes are good for different uses; the Collage theme adds a feathering effect to the edges of your images, merging them seamlessly with the white background, whereas the Scrapbook theme will arrange a few photos on one page, scattering them about. Once you’ve selected a theme, tap on the cover image in the album selection window to preview your album. This will give you a quick idea as to how the theme will work, and how it plans to arrange your images.
Exhibit your images
Your theme album title and cover image will all be decided on when creating a new album, although you’ll have the option of changing these details at any point. You can also rearrange your images once you’ve set up a theme, deleting the ones you don’t want or repositioning them. Once you’ve selected an image, you can pinch it to crop in or out as well as move it around within its frame.
As well as being able to share albums via email, Dropbox, Bluetooth and a variety of other sharing apps, it’s possible to have your album printed into a physical photo album. Open an album then tap the Menu button. Tap Order Photo Book. From here you’ll be able to select an album type, choose from a small or large paperback or hardback edition, as well as selecting which pages you want included in your album.
You’ll need to input your payment and shipping details to process the order, then your photo album will be delivered to you. This is another great touch to the Story Album app, giving you complete creative control over how you share and display your photos. It’s worth considering how you want your end album to look, depending on how you plan to view it. The formatting for a digital album that will be viewed on smartphones or tablets will be different to a physical album. You can also view albums as slideshows, which is especially useful if you’re using Screen Mirroring. With all these tools and more, it’s time to exhibit your photos with style using Samsung’s Story Album.

No Comment